
Screenly OSE is an, open source, digital sign solution that is purpose built for the Raspberry Pi. This can come in handy in any situation where people gather, business, shop, doctor’s waiting room, a church or a community center to name a few. Screenly OSE isn’t the only solution to accomplish this but it is arguably the best solution to accomplish this, or at the very minimum, the cleanest and best polish option I have ever used.
Bottom Line Up Front: If you have any reason to provide information to people in a commercial, business or community center type situation, this may be a perfect fit for you. If you have any digital pictures and would like to turn a monitor or TV into a picture frame, even home movies, I suppose (that has the potential to be obnoxious), this is a perfect solution for you. If you are looking for a useful, first project, for the Raspberry Pi with substantial application, this is most certainly a perfect project upon which to cut your Single Board Computer teeth.
This is “Front Page Linux” so, number one, you need a Linux machine to start. I use openSUSE so I will gear this, somewhat, in that direction but this will be general enough that you should be able to accomplish this on any distribution.
Prerequisites
You should have working knowledge of your computer with the ability to install software on it. You should also have a decent grasp of the terminal as you are going to be dabbling with that a bit in order to make this project a reality. Don’t worry, it is all very clear and each command will be clearly explained to you as you should never take some random command off the internet. Trusted sources only.
Items

- Raspberry Pi 3B / 3B+ or Raspberry Pi 4, preferably with some sort of case
- Active Ethernet Line (at least for initial setup)
- Adequate power source
- Device appropriate HDMI cable
- Linux machine to configure the Raspberry Pi
- USB Keybaord
Installation
There are two phases of the installation. The first will be geared to the base operating system. The second will be for the Screenly OSE application. I highly recommend you get a fresh or at least non-allocated SD Card for this project. You will not be using this device to do anything but Screenly OSE. You will be turning the Raspberry Pi in to a specially purposed digital sign appliance.
Operating System
If you know how to install Raspberry Pi OS on your SD Card you can skim through much of this. I am breaking this down to the individual that is installing Raspberry Pi OS for the first time on a brand new, right from the package SD Card.
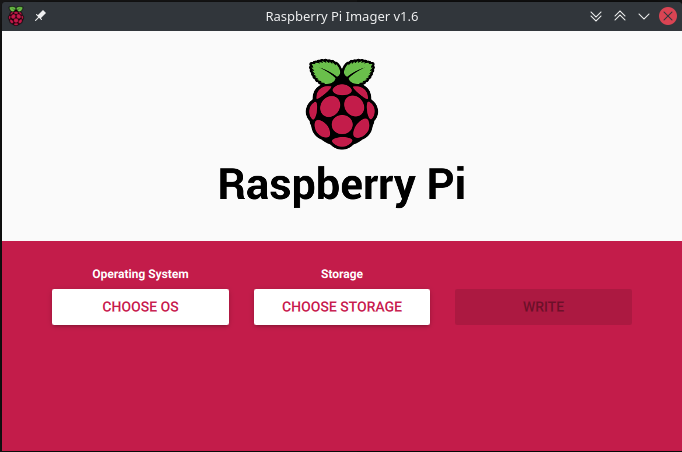
Raspberry Pi Imager
There are ways to do this all from the command line but to reduce the risk of error and make this as fun of an experience as possible, I highly recommend using the Raspberry Pi Imager. For openSUSE, there isn’t a package in the repositories, at least, not at the time of writing. There may be for other distributions. My easy button solution on this is to install the Raspberry Pi Imager Snap or Flatpak
https://snapcraft.io/rpi-imager
https://flathub.org/apps/details/org.raspberrypi.rpi-imager
The beauty of the Snap and Flatpaks is, that between the two of them, they should work on just about every distribution of Linux out there. Links to both are included, in case you have a better experience with one over the other on your particular distribution.
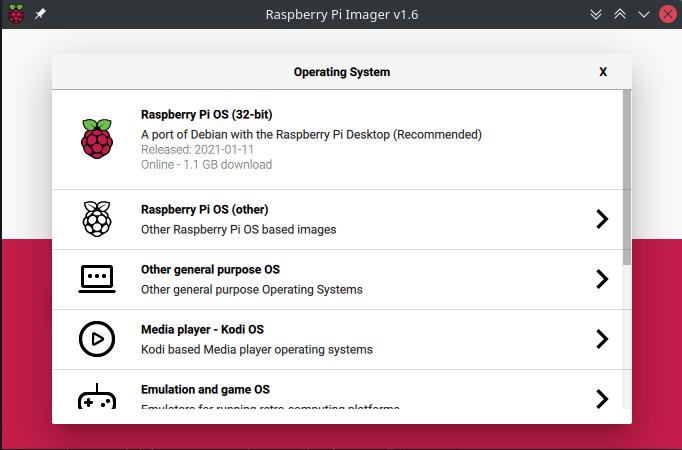
Once the Imager application is installed, be sure you have insterted the SD Card in your computer then run the application. You are now going to now select CHOOSE OS and image your dedicated SD Card for the job. The recommendation I have found, very consistently, is to use the Lite Edition of Raspbian OS. This makes the most sense as you are not going to use this Pi for anything but running a digital sign.

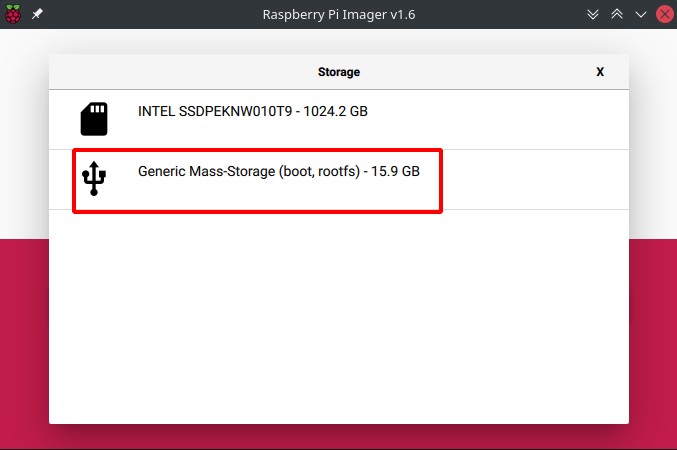
Next you will choose the correct storage and write it to the SD Card. Be absolutely sure you are writing to the correct device. The result of writing to the wrong device could be catastrophic. Unlike the SUSE Image Writer, this application doesn’t detect your system drives and omit them from the list of drives.
Enable SSH
Before you eject that SD Card out of your computer, I recommend you enable SSH. If you have a better way, of course go for it but for me, I go with the quick and easy method. Access the “boot” partition on the drive, and add a file called “ssh”. My quick method is to use Dolphin, open up the terminal (F4) and type:
touch ssh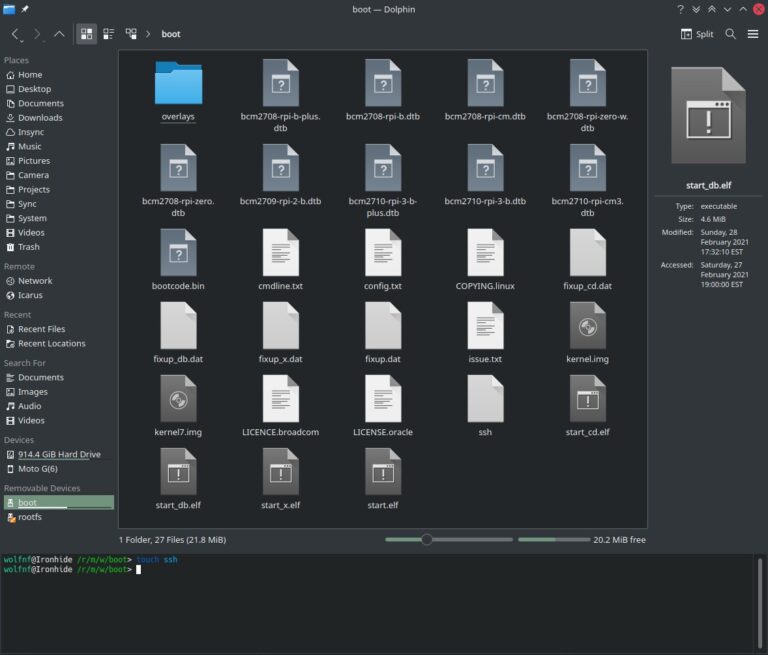
Now, when the Raspberry Pi OS boots, the SSH will be enabled and active for you to utilize. The rest of this project can be done remotely which is, by far, much more convenient than being tethered to the Pi.
Note
I did have a small issue with the Snap version of Raspberry Pi Imager where it would not start. Running it from the terminal, I received this error which was just enough to find the appropriate solution.
Fontconfig warning: FcPattern object weight does not accept value [0 205)A little digging revealed that to correct this failure, running the following in the terminal:
sudo find /usr/share/fonts -type f -exec sudo chmod 644 {} \;
sudo fc-cache -r -v
You may not have this issue, only run this if you have an error that is specific to fonts.
Screenly OSE
The ease of accessing your Pi over the network will depend on several factors. The more aware you are of your infrastructure, the less work it will require. If you know little or have no interest in doing so, here is the easy way to access your Pi to get that illusive IP address.
Connect your Pi up to the USB keyboard, monitor, Ethernet and power supply. Power it up and watch torrent of Linux happiness scroll by on the screen as this Single Board Computer boots for the first time.
Login to Pi
Using the keyboard, log into the newly booted, fresh installation of Raspberry Pi OS.
Username: pi
Password: raspberry
Once you have successfully logged in, run this in the terminal to get your ip address:
hostname -IThe following line is your IP address. In my case it is 192.168.1.123. Now you can remote into the Pi from your Linux machine (or something else, I suppose) and perform the Screenly OSE application installation.
To remote into it, open a terminal, and type this:
ssh pi@<your-RaspberryPi-IP-address>In my case
ssh pi@192.168.1.123Enter your password and don’t worry that you don’t see the cursor advancing as you type, this is a security feature.
Update Pi
It is highly recommended that you update your Pi before you install Screenly OSE. The nice thing about the ability to remote into the Pi is that you can copy and paste the next few commands. It is typically not a good idea to run a random command from the internet but since this is coming from Front Page Linux and the author is “CubicleNate”, you know it has to be good, right?
sudo apt update
sudo apt full-upgrade
Once the installation process is complete, run the script that is provided by the Screenly OSE folks. Note, this process takes a rather long time so be patient.
bash <(curl -sL https://www.screenly.io/install-ose.sh)You will be presented with a few questions. The first is a notice that Screenly OSE will eliminate the ability to use a regular desktop. This turns your Raspberry Pi into a dedicated appliance.

Your next question is a preference, do you want to use the Stable Production branch, if so, press 1. If you would like to be on the Development/Master branch were things may break but you will get new features sooner, select 2.

Next you will be asked if you want Screenly OSE to manage your network. This is recommended for most users as it will allow you some extra features to join a wireless network and such. I recommend Y for this.

Since it is possible that the time of reading these options may have changed a bit, read carefully and proceed with caution. You may be asked to do an upgrade of the Pi OS as well.
Be patient with this process, it can take as much as an hour, may be more depending on your connection speed and specific Pi model.
You will be prompted to change your password. It is highly recommended you do so for the sake of the security of this device. Never under estimate the naughty individuals that may be using your network.
After the process is complete you will be prompted to reboot the Pi.
Accessing Web Interface
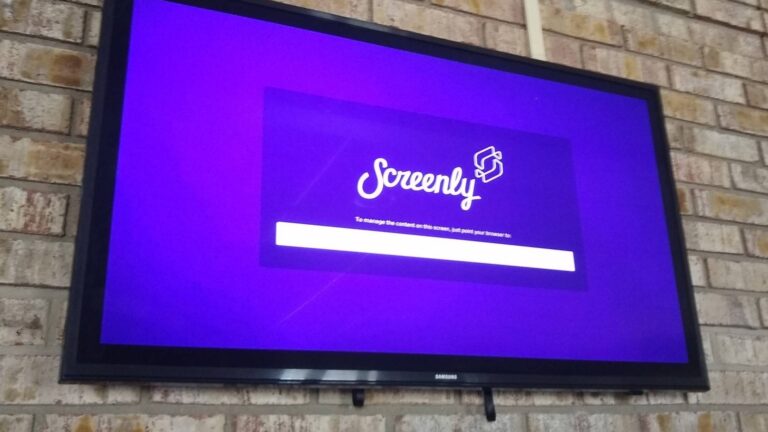
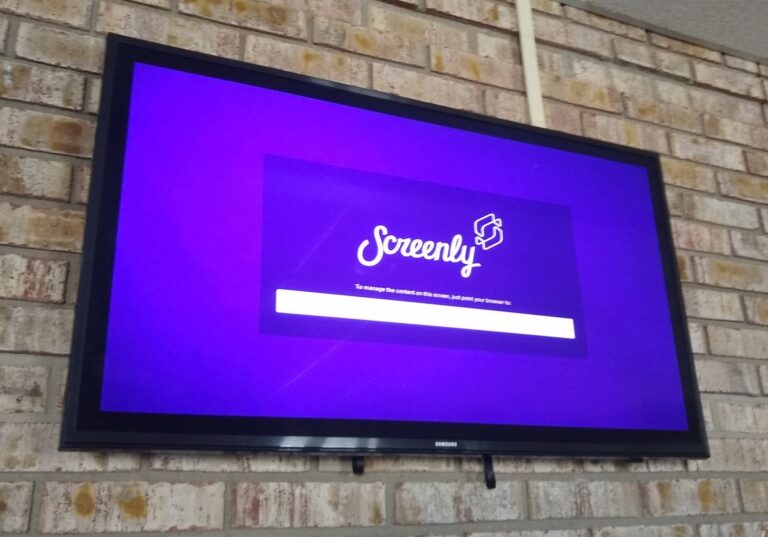
If you have it plugged into a TV or monitor, when it boots it will give you a Screenly Boot screen and tell you what its IP address is, which is great if you forget the IP. The Screenly boot screen will be displayed for quite a while so do not be alarmed.
Using your web browser of choice, navigate to the Screenly Pi using the IP address you previously used:
https://<Screenly Pi IP Address>in my case
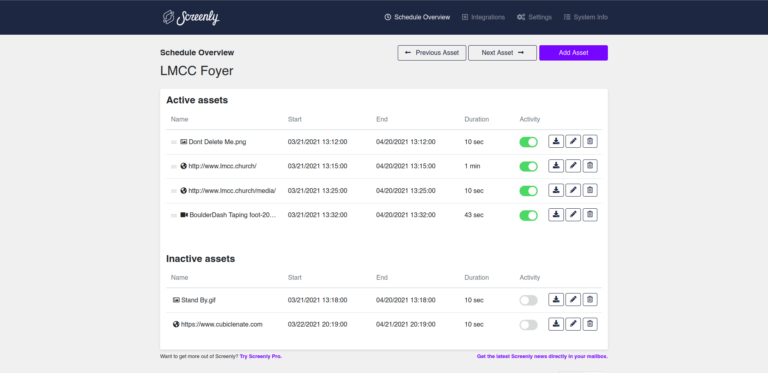
https://192.168.1.123Schedule Overview
The schedule overview is just that, an overview of whatever it is you have scheduled on your Screenly. Pictured is my list of assets with which I was experimenting in order to familiarize myself with its features. I’ll get into all that in just a bit, but first, I am going to run down what is available to you.
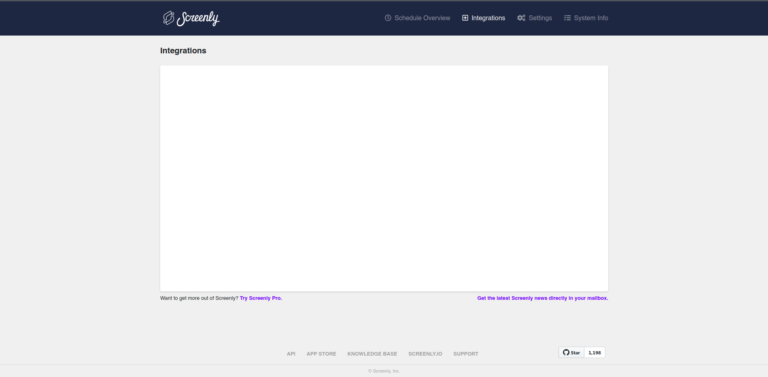
The next section is “Integrations” for which the information is limited. At this time, I am not looking to integrate anything with it but there are two options of which I am aware that you can read the details.
The next tab is the settings. There are two pages of things to play with and for my purposes, the only change I made here is to set a username and password. Since I am setting this up for an organization, I made the username and password to something memorable for them. I toggled the option to use the 24-hour clock because that format is just way more clear.
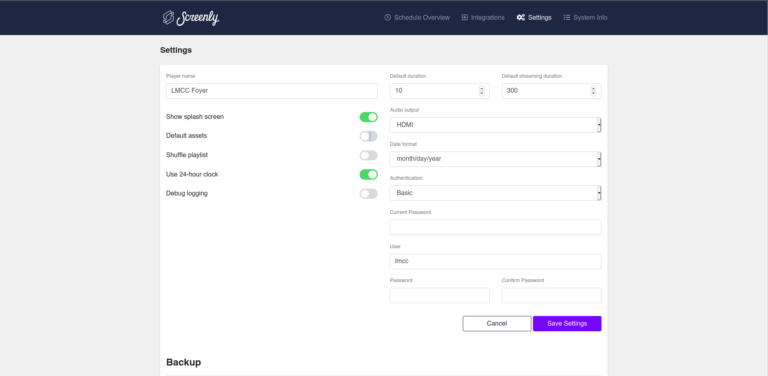
The next page of options gives you the ability to backup and recover your device, adds USB Assets, perform an upgrade, reset the wifi config and reboot or shut down the system.
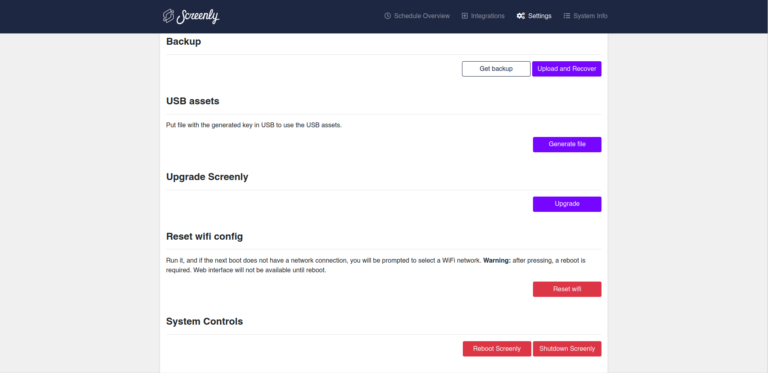
All the features here are self-explanatory but the USB assets portion gave me pause and I had to look it up. I do not need this feature at this time but the feature has merit. The idea here is that you can put assets on a USB to be used but it won’t be used unless you have the generated key on that USB device as it prevents just any random content from being added to the device.
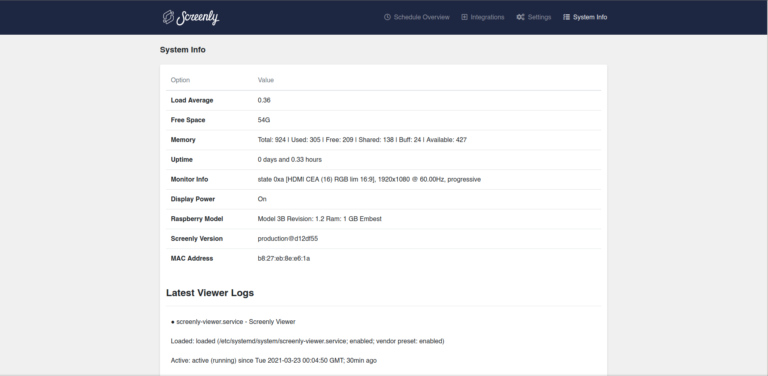
The last section is System Info and provides to you what you might expect. It gives you system vitals like Load average, Free space, memory, uptime, monitor information, hardware information and the current version of Screenly. The latest logs are also available to be viewed in this section.
Screenly is not burdened down with layers of unnecessary features that were added by committee. This is a lean, purpose built application that gives you access to the necessary items to get going quickly. Now, it’s time to add some assets and put a bow on this project.
Adding Assets
There are two pathways for adding assets to your Screenly OSE Raspberry Pi appliance. The first is via a URL. This is valuable in the sense that you can land on a web page that may have an organization’s home page, or a specific page with critical information, weather or even a YouTube video.
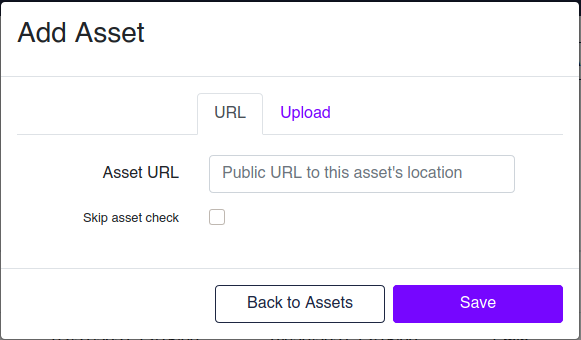
I have tried a few other video streaming services without success. It would have been nice to be able to use something other than YouTube but I am grateful for at least one service. Perhaps more will be added in the future.
The other Asset addition path is to upload the files to the device. You can use the file dialog to select images and videos or drag and drop them onto the dash-line rectangle to begin the upload as well.
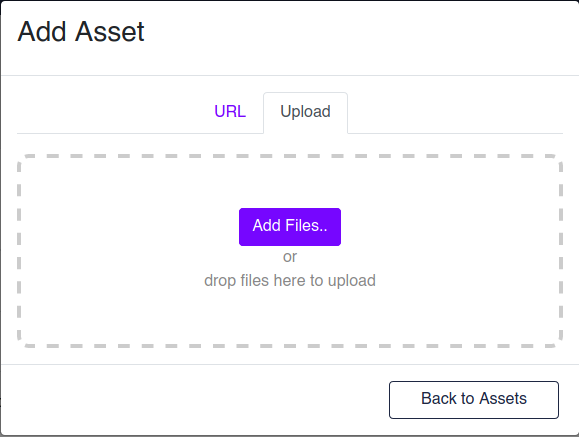
Adding assets by copying them into the folder will not make them available to be utilized. They must be added through the web user interface. The closest thing to a kind of picture dump is to use the USB Asset option.
The assets that you can load are limited to web URLs, Images and Video clips. I did read that Office documents, like presentations can be used but are not officially supported. My experience has been, at the time of writing, that the uploader will deny uploading the anything but what is on this list of supported content.
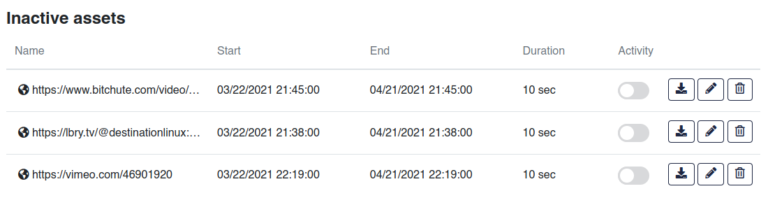
In testing, Bitchute, Lbry and Vimeo did not load as video assets.
Scheduling Assets
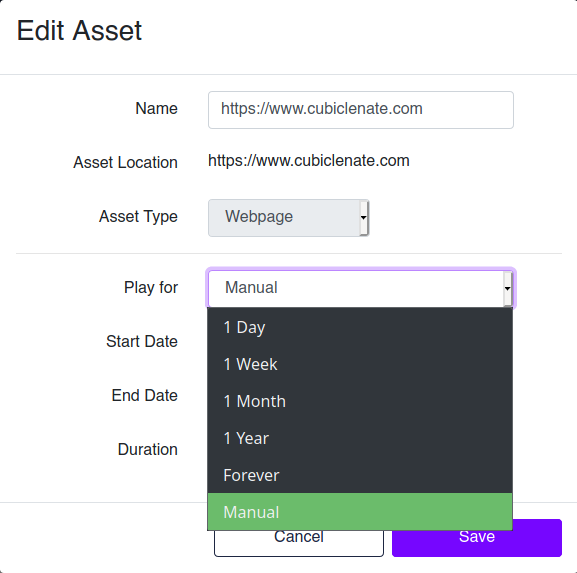
After you have added assets, they will, by default, sit in the Inactive assets section. A flick of the “activity” switch will put in in the Active Assets section but that is only the start. You can set a time duration manually for a day, week, month, year or forever. The manual option is dictated by a range of dates. You can also set a duration. This is useful for displaying more complex screens or on websites. Video assets will automatically adjust the duration to the length of the video and this is not adjustable.

Once you understand the asset manipulation you have achieved your first “Screenly User Badge” and can effectively employ as many of these devices as you see fit. The OSE version of Screenly is a great tool that will likely do the job quite well for most of your digital display requirements.
The Screenly company graciously provides an open source edition but your organization may benefit from the features of the pro version. I highly recommend you check out this comparison post on their website and see if the additional features support your use case. It may be worth using.
Running Screenly OSE
Once you have added the desired assets to Screenly, it will begin cycling through the list of Active assets for the duration specified. When the last item plays, it will restart the playlist from the beginning. The controls on the Schedule Overview page allow you to skip to the previous or next Asset.

This is useful for checking your Assets after you have added them. Some websites may not display as you expect and may require some tweaking to use correctly. Once you are satisfied, you can log out of the Screenly web interface and be satisfied with a job well done that your digital sign is now operational and providing all the important bits of information to keep your community well informed.
What I Like
In a word, Screenly OSE is an application that can be described as “easy”. Everything from the set up of Screenly OSE to the actual use and implementation. Although there are a lot of steps in the process and the much of the learning curve is specific to the Raspberry Pi platform, the process is not ambiguous at all. It is largely getting the right tools make it happen. The recommendation to use Rasbian Lite OS which gives leaves you with a terminal interface and just enough to initiate the Screenly OSE installation script.
The ability to easily import the desired media through a super easy and intuitive interface. Your options are images, videos or websites. I have successfully imported various sized video files. Additionally, you can add a YouTube video in your assets which is very useful.
This is a low maintenance, simple to administer product that can easily be implemented in various environments. There are many ways this can be used to keep information flowing or to turn your TV into a giant picture frame that can be used during family gatherings or perhaps even for graduation parties with pictures that are certain to embarrass the graduate. This is an application I wish would have had available to me a decade ago. I would have happily employed this.
What I Don’t Like
The Schedule Overview page on the web user interface doesn’t actually report what asset it is currently viewing. It would be nice to know if, for whatever reason you are wanting to test some media out on the device. This is more of a nice to have and not a “must” but it is certainly missed.
Although I really appreciate the ability to use a URL for a YouTube video, I would have preferred the option of some other video platform sources, specifically LBRY, Bitchute and Vimeo. I say this, not because I have a huge library of videos not available on YouTube, but rather, just to have the option. I didn’t even know YouTube could be played within Screenly OSE until I tried it on a whim. This FAQ makes no mention of YouTube compatibility.
In the short time I have been using Screenly OSE, it has been incredibly reliable and seemingly stable. I would have, however, preferred they built this on an openSUSE base. The only real reason for this is the poor luck I have had in delayed updates on Debian based systems. Somehow, I seem to end up with some sort of package database corruption over time and me not being able to keep the system upgraded. The system tools for managing hardware that is baked into openSUSE makes administration so much easier.
References
https://www.screenly.io/ose/
https://pimylifeup.com/raspberry-pi-screenly/
Raspberry Pi Imager Snap from SnapCraft.io
https://www.raspberrypi.org/software/
https://askubuntu.com/questions/1235388/snap-version-of-vlc-does-not-work-on-ubuntu-20-04
Turn your Presentation into a Video – Microsoft Office
Supported Content on Screenly
Screenly OSE vs Pro
