

Linux KVM is a complete, open source virtualization platform. It is used by many cloud providers and virtualization products use at their core, and it has an extensive set of tools. What many Linux users don’t know, is that KVM is great also to be used as a desktop virtualization solution. It is easy to install, runs super fast, has no proprietary licenses. On top of that, you are likely to learn some enterprise virtualization skills while using it. Also, for those that work in IT, it is really great to have same virtualization platform that runs on desktops, laptops, and on servers.
This tutorial is aimed to new Linux users, or users that are not familiar with KVM hypervisor. I will take you through installation of KVM and creation of a virtual machine step by step. Please note that this is just a first steps introduction tutorial, and covers the basics of KVM as virtualization platform on the desktop.
Let’s Get Started
In this tutorial, I am going to use openSUSE Tumbleweed as my operating system. Installing KVM on openSUSE is super fast. First we’ll need to install the YaST modules and other needed software.
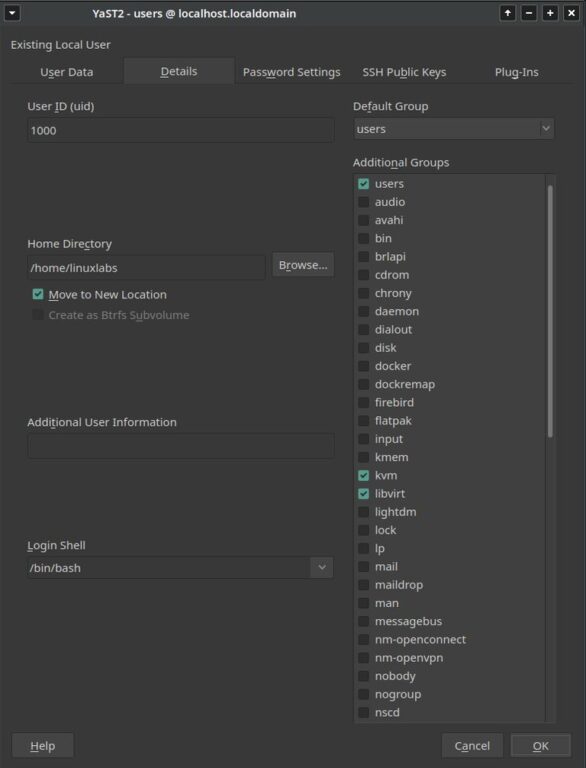
sudo zypper in yast2-vm bridge-utils patterns-openSUSE-kvm_server patterns-server-kvm_tools libguestfsBy default, some distributions will ask you to authenticate yourself every time you start virt-manager with your sudo password. If you want to bypass this process then open YaST and go to “User and Group Management” section. Now, select your user and click on the Edit button. From here you will need to add your user to the following groups: users, kvm and libvirt.
These user group changes will not take into affect until your next reboot or if you’d like a faster way to initiate them you can logout and log back in to your system without having to reboot.
In the case that you are not running openSUSE then you can jump to the bottom of the tutorial to find links for reference instructions for other distributions.
Configuration
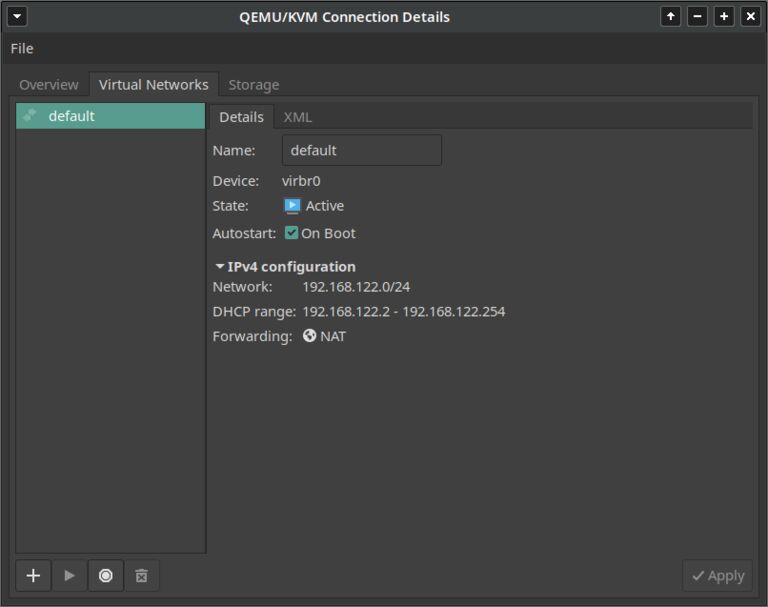
Now that basic installation is done, we’ll need to check a few things to ensure KVM runs as smoothly as possible on our system. First let’s test the configuration of the Virtual Networks.
Open the Virt-Manager application and click on your KVM server to select it. At the top of the window click on Edit and then select “Connection Details” from the corresponding menu. In the next window navigate to the “Virtual Networks” tab. From here, select the default network and make sure that the the “Autostart On Boot” checkbox is ticked. If it is not enabled then check the box and press the “Apply” button.
Configuration – Storage
Open Virt-Manager, double click on your KVM server, and navigate to the “Storage” tab.
Select the default storage, and make sure location is /var/lib/libvirt/images. It is very important to leave it as default. openSUSE does a great default configuration on this location: A BTRFS subvolume is created by default, and CoW (Copy on Write) is disabled on this subvolume. This is optimal for virtual machines. Also, this BTRFS subvolume is excluded from snapshots. This is done on purpose to avoid VM data loss while restoring a snapshot.

Configuration – Preferences
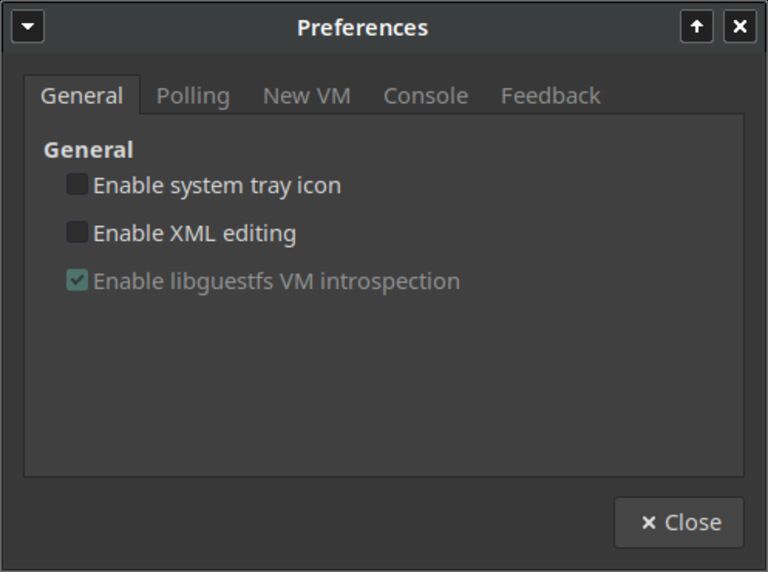
Open Virt-Manger, Edit menu, Preferences, General Tab. Depending on your DE and preference, you can tick “Enable system tray icon”.
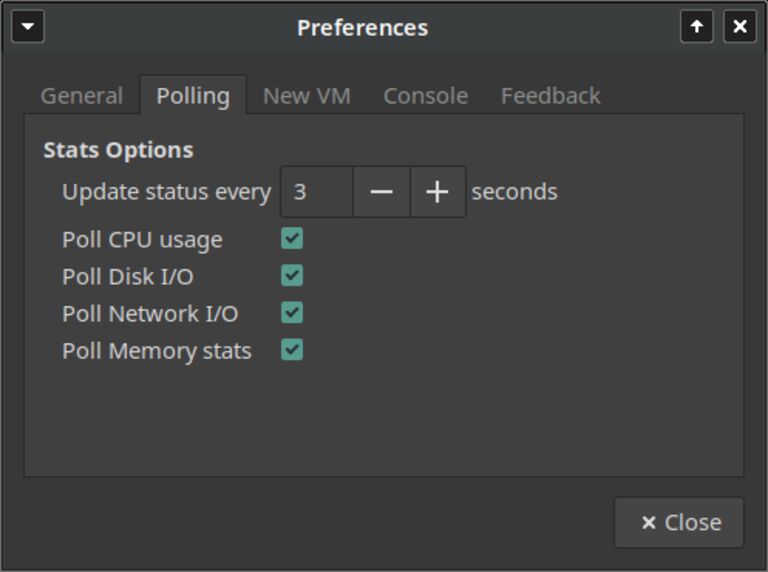
Open Virt-Manger, Edit menu, Preferences, Polling Tab. Enable all options.
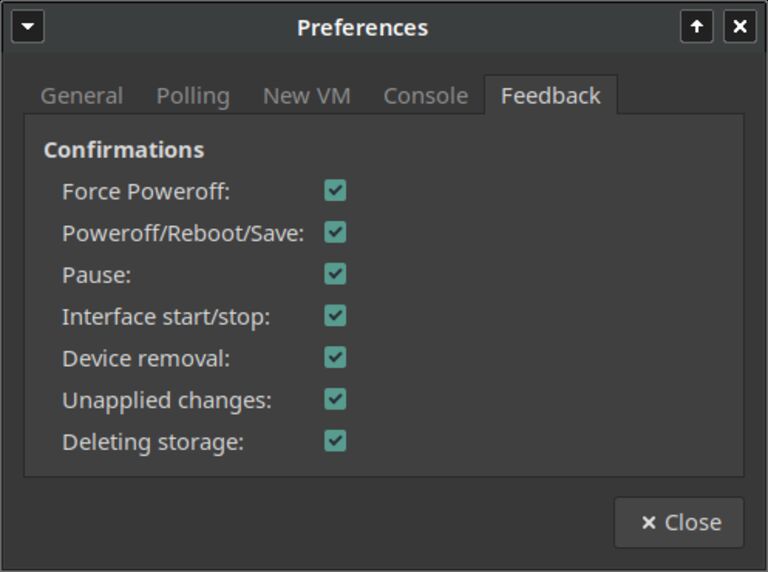
Open Virt-Manger, Edit menu, Preferences, Feedback Tab. Enable all options.
Open Virt-Manger, View menu, Graph. Enable all options.
That’s it, all our configurations. Last thing to do is do a good old reboot, and make sure our Virtual Networks and Storage are started automatically.
Nested virtualization
KVM supports a feature you may want to check out called Nested Virtualization. This features gives you the ability to install a VM Hypervisor inside of an existing Virtual Machine. This is a very handy to study or test other virtualization platforms. If you want to enable nested virtualization, you can check the reference articles linked at the bottom of the tutorial.
Linux VM Install: Fedora Workstation
Time to have some fun. Let’s go and test our setup. Nothing better than VM-Distro-Hopping for a bit.
Let’s check out the latest Fedora Workstation. Head to download page, look for the the 64bit .iso file and download it on your default Downloads directory. If you would like to verify the download, you can do so here.
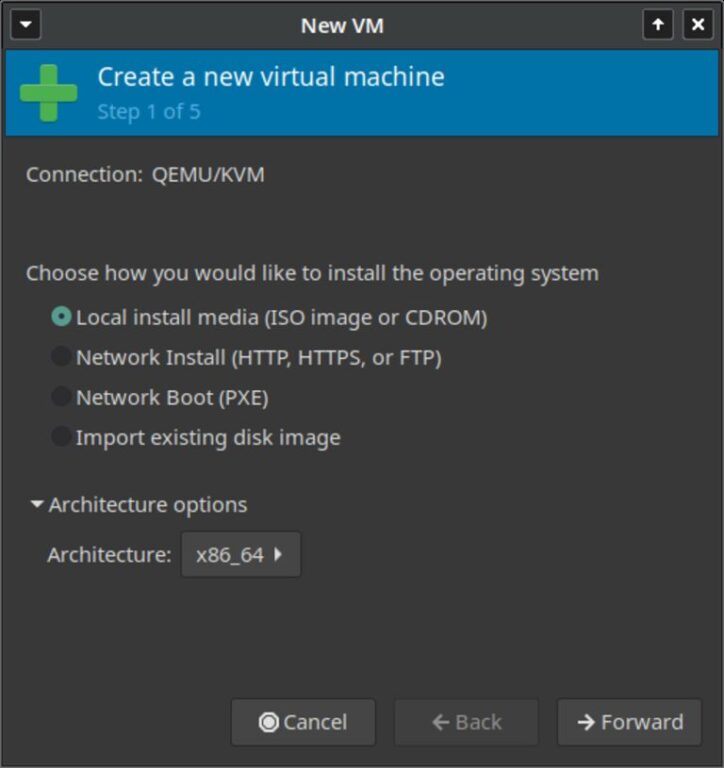
Now that we have downloaded and verified the file, let’s open Virt-Manager, and click on the big “+” Icon to create a new VM.
Step 1 of 5: Select Local Install Media, and click “Forward”.
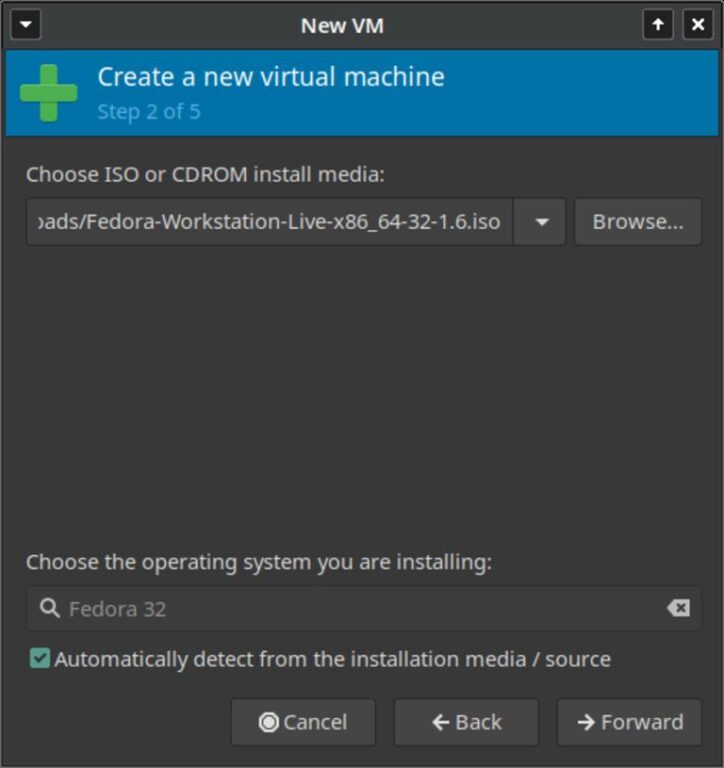
Step 2 of 5: Click “Browse…”. On the “Chose Storage Volume” window, click “Browse Local”. Navigate to the .iso file and confirm by clicking “Open”. The operating system should be automatically detected. In case it is not, uncheck the “automatically detect from the installation media / source” and type the name by hand. Once done, click “Forward”.
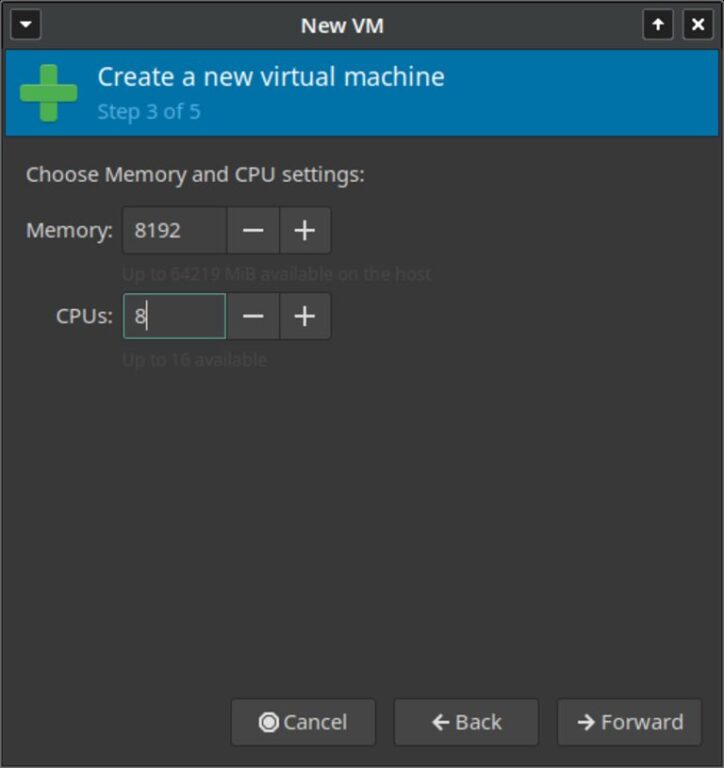
Step 3 of 5: Assign Memory and CPUs. I am going to assign 8192MB of RAM and 8 CPUs
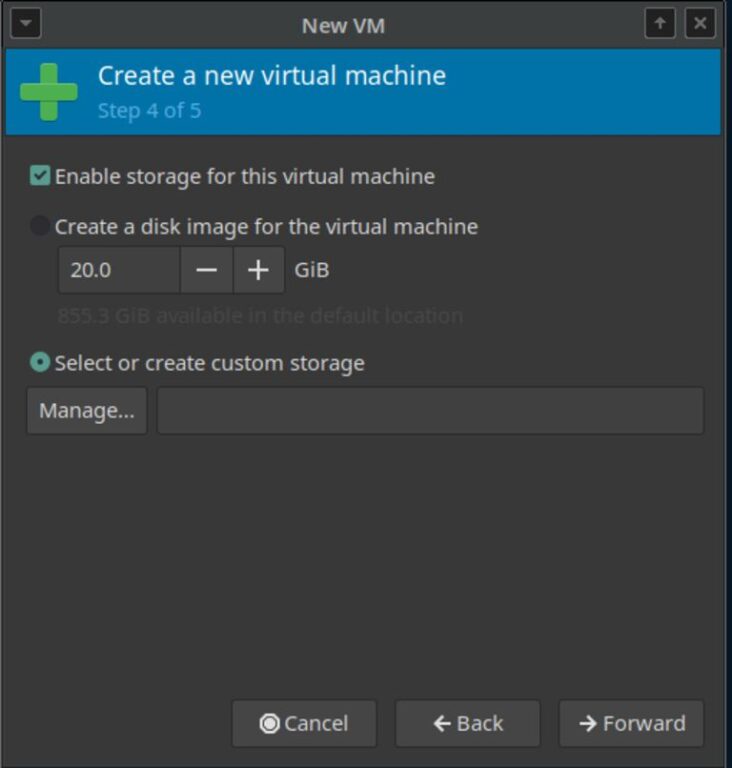
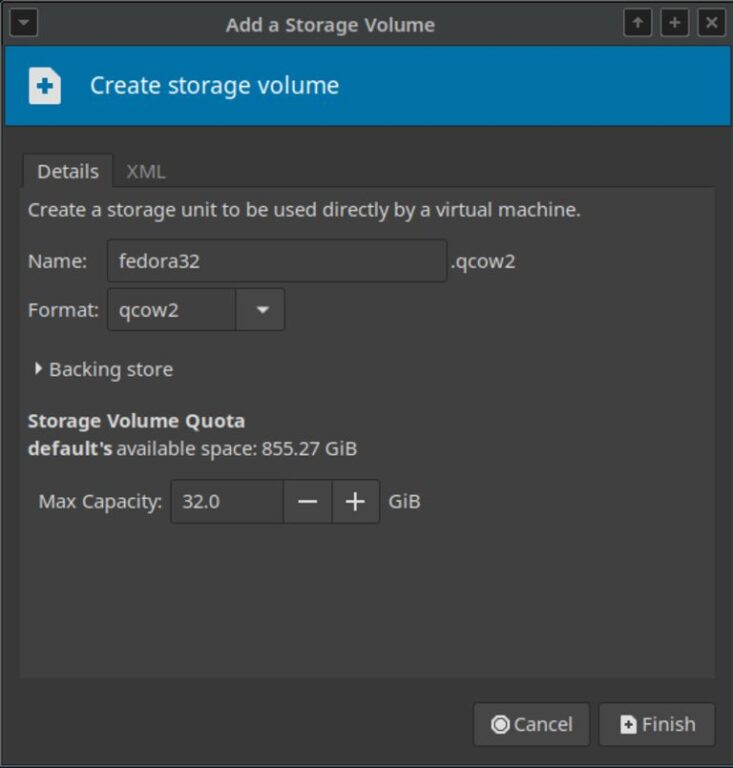
Step 4 of 5: Assign Storage. Tick the “Enable storage for this virtual machine, then select the “Select or create custom storage” option. Then click “Manage”. On the next menu, make sure you select the default storage repository, and click “+” next to Volumes. Select a name for your virtual hard disk, format should be qcow2. In max capacity, select your target maximum size of virtual hard disk. In my case, 32GB.
NOTE: Creating the virtual disk using this method is a bit slower, but it ensures the virtual disk is created thin provisioning. More on this topic later.
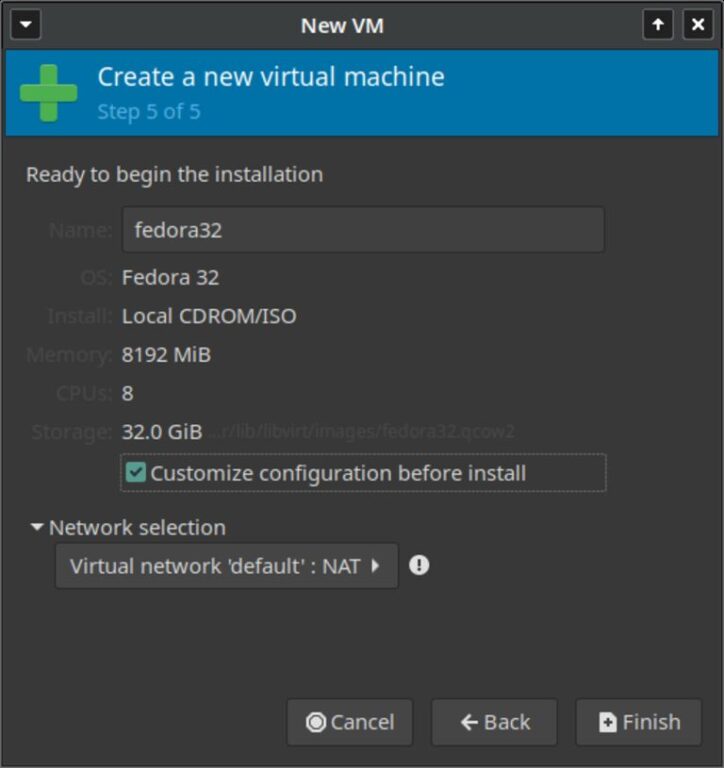
Step 5 of 5: Ready to begin the installation. Select a name for your VM, select your Network. Tick the “Customize configuration before install, and click “Finish”.
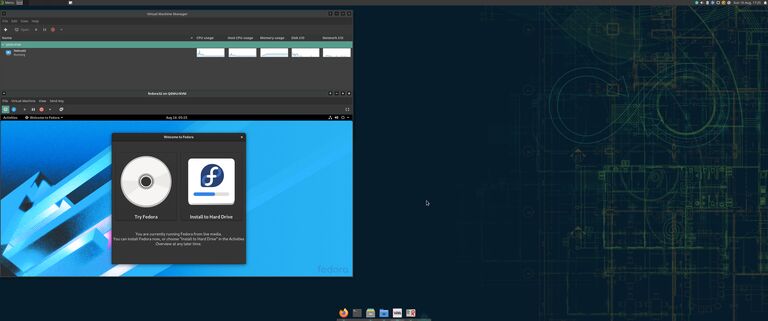
Let’s Make sure that our defaults are good. It is important to check that the virtual hard disk and network are using “virtio” drivers, and that display is “Spice”. Also make sure you have an hardware called Channel qemu-ga. This is to make use of the qemu guest agents. Feel free to have a look around, add hardware as needed. Defaults for most Linux VMs are already good. Click on “Begin Installation” when ready.
NOTE on VM auto resize: If you want to have the VM automatically resized with the Virt-Manager window, all you have to do is go to the “View” menu, scale display, and tick the “Auto resize VM with window” option.
Thin provisioning
If you followed my tutorial, your VM’s virtual disks are using thin provisioning. This means that the virtual disks only take the space they actually use, instead of the maximum size of the virtual disk you created. This is very useful especially when using KVM as desktop/laptop virtualization platform. Overall it also helps making backups smaller and faster, therefore I recommend always using it. Only need to be careful not to over-commit your host storage resources.
If you have already created a lot of VMs and you don’t know if you are using thin provisioning or not, keep reading. For this demonstration, I created 2 Fedora VMs. One with thin provisioning, and one without. Let’s have a look.
- Open virt-manager and stop your VMs. In my case fedora-test-1 and fedora-test-2.
- Open a terminal as root user and move to your default VM storage repository.
cd /var/lib/libvirt/imagesNow, this can get a bit tricky, “ls” command may or may not be able to see the thin-provisioned disks real size. However, the “du” command will return the correct values. Let’s try and run them both. Then see the differences:
ls -lah *.qcow2du -sh *.qcow2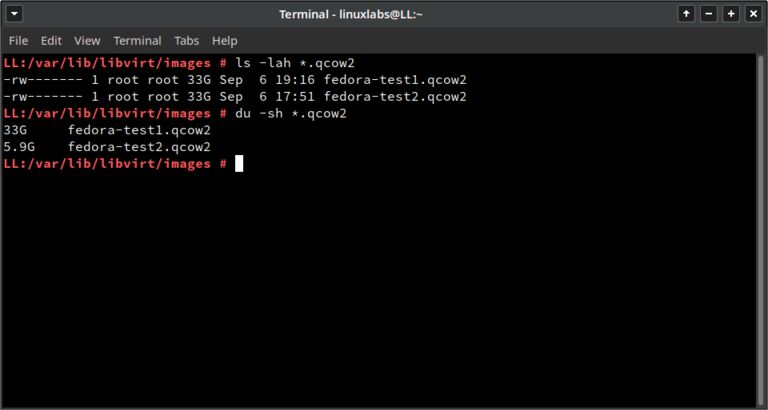
As you can see, fedora-test1 virtual disk is not thin-provisioned. However, fedora-test2 virtual disk is. And both being fresh installs, you can clearly see how huge of a difference between the two, in terms of hard disk space.
So, what now? Do I have to delete the whole virtual machine and start from scratch? No way! here comes virt-sparsify to the rescue! The virt-sparsify command can take any qcow2 virtual disk, copy it to a new one, and while doing it, copies only used space of a VM. You need the liguestfs-tools package installed at the beginning of this tutorial. Let’s give it a try!
virt-sparsify -q fedora-test1.qcow2 fedora-test1-thin.qcow2Note 1: “-q” option is quiet, removes output. If you want to see what is going on, don’t use the “-q” option.
Note 2: As the virt-sparisfy copies your virtual hard disk to a new one, make sure you have enough storage space to complete the task.
Once the command completes, run again “ls” and “du” commands and see if our conversion completed successfully. Again we can see if there are any differences running “ls” and “du”.
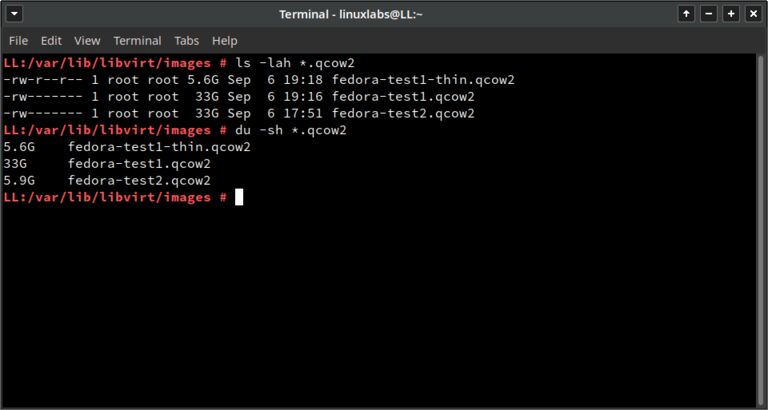
Victory! We can see that our virtual disk fedora-test1 was converted and there is a huge difference in space used. Let’s make sure that the virtual machine runs:
- Rename fedora-test1.qcow2 to fedora-test1-old.qcow2
- Rename fedora-test1-thin.qcow2 to fedora-test1.qcow2
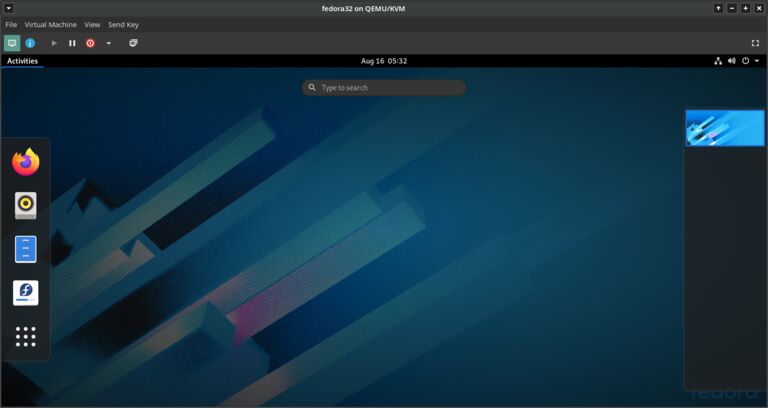
- Power on the virtual machine. Yes, all works fine. Excellent!
- Now I can remove the fedora-test1-old.qcow2 virtual disk
That’s it, you’ve now successfully completed the getting started guide for KVM. If you found this tutorial helpful, please share it on social media or with people you think will benefit from it. If you have any questions about anything in this tutorial, please leave a comment below and I’ll be glad to help. The only thing left to do now is have some fun and VM-Distro-Hop! This article is also a part of a larger series that I’m writing so be sure to check out my other articles for more information.
