PulseEffects simplifies management of pulse audio settings, and gives a very useful toolset of effects. This a follow up on my tutorial “Easily Install JACK Audio with Ubuntu Studio Installer“. After going through with all the JACK configurations, I thought it would be fun to try and see what we can do with Pulse Audio and PulseEffects.
In order to have a fair comparison between the two audio servers, I am going to use same hardware, same audio interface, and same distribution. Ubuntu Budgie 20.04 was the OS I chose in our first tutorial. I made a fresh install on a separate SSD, and updated the system. So, let’s get started and see how PulseEffects stacks against Jack.
Target Audience for this Tutorial
This tutorial is targeted to all linux users. Installation and configuration is very easy and most configurations can be completed without entering a single command in the terminal. Having said that, further tweaks and configurations to optimize hardware support or resolve issues, might require editing a few text files.
- PROs
- Available to install on all major distributions.
- Easy to setup and use.
- PulseEffects is very easy to manage and be set to start as a service.
- CONs
- Audio latency, quality and configuration flexibility is nowhere near what can be achieved with Jack.
- Advanced settings requires manual installation of low latency kernel, and changing pulse settings via terminal.
- Troubleshooting complex issues when they occur, can take more time than learning Jack.
Step 1: OS Installation
- Install the OS. In this tutorial, I am using Ubuntu Budgie 20.04 LTS.
- After Install, Open “Software” then “Software and Updates”, “Other Software” tab, and enable Canonical Partners. Alternatively, you can enable partner repos by editing /etc/apt/sources/sources.list and uncommenting Canonical Partners repo.
- Apply the new setting, reload the cache, and exit the application.
- Open “Software Updater”, then install all updates and reboot. Alternatively, you can run the following commands in your terminal:
sudo apt-get update && sudo apt-get dist-upgrade -y Step 2: PulseEffects installation
Installation is quite straightforward: search and install PulseEffects using your GUI package manager. If you prefer the terminal, I added some examples for major distributions below.
- Debian/Ubuntu:
sudo apt-get install pulseeffects - Fedora:
sudo dnf install pulseeffects - Arch/Manjaro:
sudo pacman -S pulseeffects - openSUSE Tumbleweed:
sudo zypper in pulseeffects
Step 3: PulseEffects configuration
Before we configure PulseEffects, let’s make sure we change our Pulse audio default devices. I am going to set my Audio Technica 2020USB+ as default for both input and output.

PulseEffects default configuration is made to be compatible with most audio devices out there, therefore it is very far from being optimized. This is not a problem and in this tutorial I will show you how to optimize your settings, and decrease latency.
NOTE: I am going to guide you through optimal settings for my audio interface. I am currently using an Audio Technica 2020USB+ condenser microphone. You might have different hardware and my optimized settings might not match with yours. It is good practice to check your audio interface’s manual and specifications. As a general rule for tweaking audio settings in PulseEffects:
- General rule on Block size, is smaller Block Size = less latency. However some interfaces or sound cards might not play well with low settings. Play around a bit and find what works for you.
- Buffer and Latency settings. Again, hardware dependent. Try with my settings and if they are not ok, you can gradually increase until your sound quality and lag is acceptable. Please note that lowering buffer and latency too much might cause PulseEffects to freeze or crash.
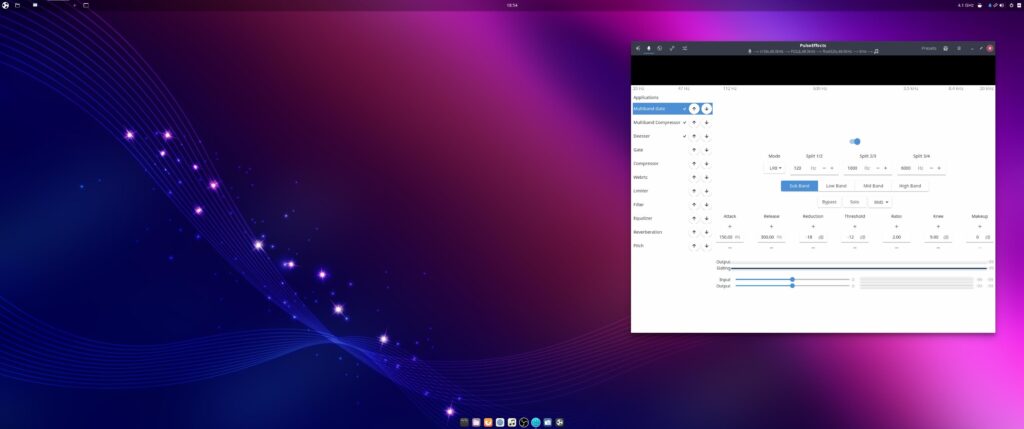
Ok, enough with my ramblings. Let’s go ahead and start with PulseEffect configuration.
- Open PulseEffects, select the options menu on top-right.
- In the “General” tab, select options as follows:
- Start Service at Login
- Process All Outputs
- Process All Inputs
- Priority Type: Niceness
- Niceness: -11

- In the “Pulseaudio” tab, – Click the microphone icon and select options as follows:
- In the device list, open the dropdown and select your preferred input device.
- Block Size: 128
- Pipeline Input Buffer: 10000
- Pipeline Input Latency: 1000
- Pipeline Output Buffer: 10000
- Pipeline Output Latency: 1000

- In the “Pulseaudio” tab, – Click the speaker icon and select options as follows:
- In the device list, open the dropdown and select your preferred output device.
- Block Size: 128
- Pipeline Input Buffer: 10000
- Pipeline Input Latency: 1000
- Pipeline Output Buffer: 10000
- Pipeline Output Latency: 1000

That should do it. Now it is time to have fun with microphone effects. In order to make a fair comparison, I will setup same effects as in my JACK tutorial:
- A noise gate. This is very useful to reduce background noise.
- A compressor. Compressor is important as it levels volume automatically, and clips spikes, making you sound much better during audio calls.
- A Deesser. Nice to mitigate those annoying “s” sounds.


Now that all options and plugins are configured, it is time to start our good old OBS-Studio, put our microphone in monitoring mode, and check audio quality and latency. As usual, I will be using my Audio Technica 2020USB+ for both input and output. And use the slider on my output to switch between direct monitoring at the hardware level, and system audio output monitoring. This will give me a feel on how PulseEffects does with my latency.
This next step will be very familiar if you saw my JACK tutorial.
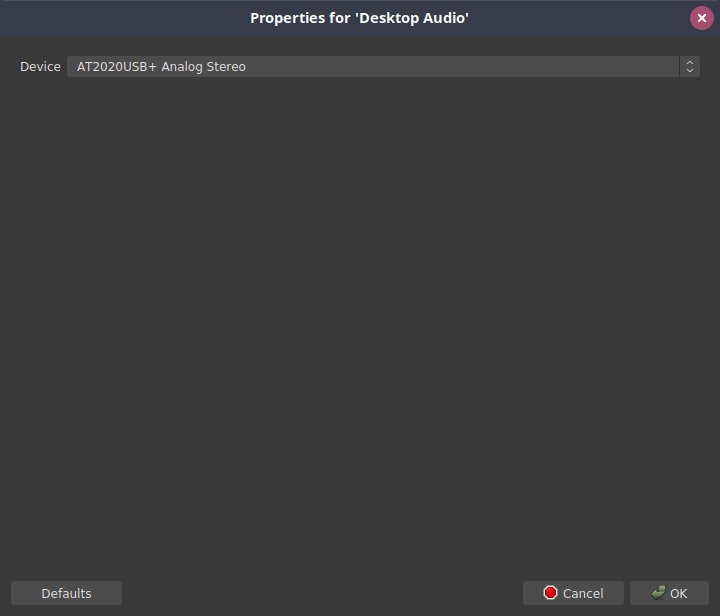
Open OBS Studio. In the Audio Mixer panel, click the gear icon on Desktop Audio and select properties. Select your output device, in my case “AT2020USB+ Analog Stereo”, and confirm by clicking “OK”.
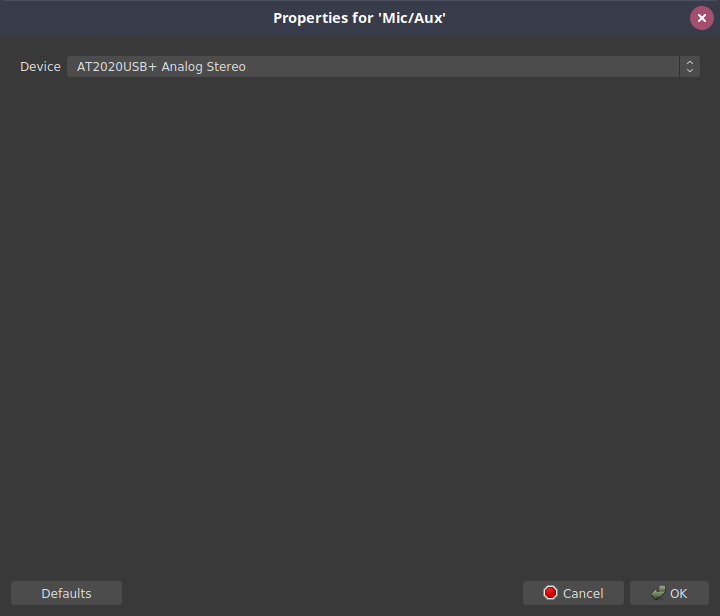
Now, let’s do the same for our input: In the Audio Mixer panel, click the gear icon on Mic/Aux and select properties. Select your input device, in my case “AT2020USB+ Analog Stereo”, and confirm by clicking “OK”.
Click the gear icon on Mic/Aux and select “Advanced Audio Properties”. In the Mic/Aux Audio Monitoring, select “Monitor Only”, and click “Close”

We are now ready for some tests. Connect your headset in your interface’s monitoring/output port. Speak in your microphone and try to focus on the sound coming out of your headset. In my case, sliding the bar towards hardware monitoring and then back to system audio monitoring, I can hear a very clear delay when using PulseEffects.

So how is PulseAudio and PulseEffects so far? Honestly, not so great. The latency might not seem a big deal in the numbers reported by PulseEffects, but I can clearly hear some noticeable delay from the moment I speak and when the audio gets back to me through the system. I also noticed the longer I leave OBS Studio open in monitoring mode, the worse the lag becomes.
Step 4: PulseAudio optimizations
Time to roll up my sleeves, let’s see if I can do any better than that. This is what I am going to do next:
- Make sure that PulseAudio can run with real time privileges
- Tweak PulseAudio server settings
- Install Low Latency Kernel
- Test again
Checking PulseAudio and PulseEffects using htop and system monitor, it seems priorities reported in PulseEffects are not applied. This requires some investigation.
pulseaudio -vvv

I: [pulseaudio] main.c: setrlimit(RLIMIT_NICE, (31, 31)) failed: Operation not permitted
I: [pulseaudio] main.c: setrlimit(RLIMIT_RTPRIO, (9, 9)) failed: Operation not permitted
Ok, that’s not good. Let me dig around and see why pulseaudio is failing to get real time permissions. Checking my groups and security limits, I found the configurations we need are not there.
First of all, let’s create a group:
sudo groupadd pulse-rtThen, add our user to this new group:
sudo usermod -a -G pulse-rt youruserNext, let’s edit the security limits: Edit the file /etc/security/limits.conf and add the following lines:
@pulse-rt	- 	rtprio		9
@pulse-rt	- 	nice		-11
@pulse-rt	-	memlock		unlimited
NOTE. The last memlock setting, has some positive effects over your audio, but might cause other issues. Have a look at the Ubuntu man page and decide if that is something you want to try. And remember to keep an eye on your system resources if you decide to implement it. Personally, I have not noticed any issue.
Ok, that was not too bad. Now let’s check what else we can try to improve our audio quality and latency. First, I am going to take a backup of my pulse audio settings:
sudo cp /etc/pulse/daemon.conf /etc/pulse/daemon.conf.bakNow that I have a backup, I am going to edit a few settings:
high-priority = yes
nice-level = -11
realtime-scheduling = yes
realtime-priority = 5
flat-volumes = no
resample-method = speex-float-10
avoid-resampling = yes
default-sample-format = float32le
default-sample-rate = 48000
alternate-sample-rate = 44100
default-fragments = 4
default-fragment-size-msec = 5
Last task, I am going to install low latency kernel:
sudo apt-get install rtkit linux-lowlatency-hwe-20.04Time for a good old reboot.
After reboot, there are a few things left to check:
- Am I running the lowlatency kernel?
- Open a terminal and run:
uname -a - Something like this should be displayed:
Linux yourhostname version.of.kernel-lowlatency
- Open a terminal and run:
- Is PulseAudio now able to grab real time permissions?
- Open a terminal and run:
pulseaudio -vvv - Success:
- D: [pulseaudio] core-rtclock.c: Timer slack is set to 50 us.
- D: [pulseaudio] core-util.c: setpriority() worked.
- I: [pulseaudio] core-util.c: Successfully gained nice level -11.
- Open a terminal and run:
- Did the PulseAudio changes apply?
- Easy one to check. PulseEffects reports most of the changes in its top bar. I am satisfied.
- Last but not least: Is my audio quality and latency improved?
Moment of truth. Did this all work?
All the changes above are very much system and hardware dependent, so unfortunately there is no “easy win, fit-all” config. Actually, it is quite easy to get it wrong and make things worse, testing is needed.
Browsing through my music collection, I found my perfect candidate: “Now we die, by Machine Head”. Classical instruments? Check. Blood-Pumping drums beats? Check. Robb Flynn Vocals and Machine Head signature distorted guitar riffs? Check. Play!
All this work got me quite involved and I was very curious to know the outcome. As the song’s violin intro started, I was thinking: Wow, Nice! No crackling, no popping sounds, no lag, just good quality music, not bad!” Then, after 30 seconds, I realized I was holding my breath. I told myself “I guess I can breathe again now, test passed!” 🙂
Last test, OBS Studio, microphone monitoring test. Victory! I can clearly hear very nice improvements. There is still some slight delay but it is way better than when I started. I am sure there could be other improvements I can try and find but for now, this is the best I can do. I take it!

Conclusions
As you can see, this was quite the journey. In the beginning It looked like it was going to be very easy. However, sound quality was not really acceptable and the latency was real. Enough for every day use of a desktop PC? Probably so. But not for me. I am always on microphone and I want it to sound good, with no lag.
As I stepped up the effort to improve the quality, There was quite some research time, trial and error, testing and some frustration. Having said that, the end result is not bad, not bad at all.
So, Is PulseAudio and PulseEffects going to be a good replacement for JACK? Well, this whole PulseAudio and PulseEffects adventure already kept me up until 3AM. Time to sleep, gather my thoughts, and write another article to wrap up my journey into Linux audio.