
Packaging software has historically been a sore spot for Linux users over the years. Different distributions use their own package managers (or the package manager of the distribution they are based on), with the big three being the Advanced Package Tool, known as APT (Debian-based), the RPM Package Manager, known as RPM (originally Red Hat-based), and Package Manager, known as pacman (Arch Linux-based). Of course distributions that are not built on top of these main three have their own as well.

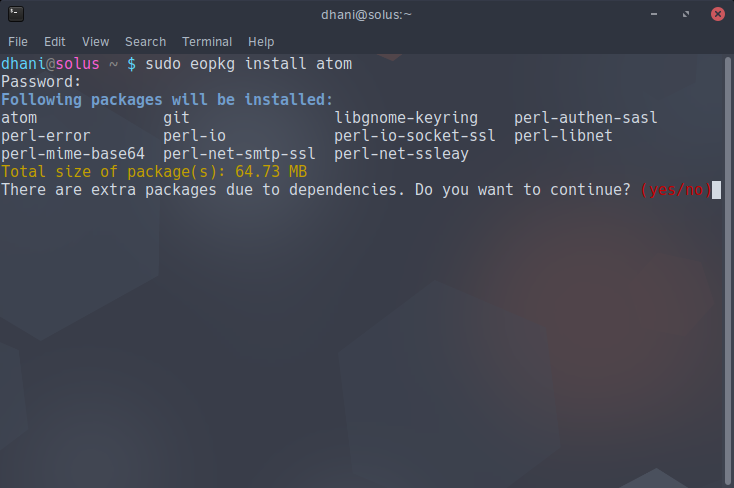
For instance, the increasingly popular Solus uses it’s own package manager known as eopkg, Intel’s Clear Linux* uses one known as Software Updater or swupd, and Void Linux uses the X Binary Package System or XBPS. Obviously, this can become confusing quickly and if you want to try a distribution outside of the family that you’re accustomed to, it usually requires learning completely new ways of installing and managing software.
In addition, not all software is available for every package manager. Because Debian is the most widely used family of distributions, it is most likely that you will find software in the APT repositories as they are usually targeted by software developers first, but sometimes even that is not possible. The situation is only slightly worse with RPM and pacman (and incredibly more so for the smaller ones mentioned).
Moreover, there are even distribution specific ways of retrieving software. Ubuntu (and it’s many derivatives) have access to the Personal Package Archive (PPA) system. Arch-users have the massive breadth of the Arch User Repository (AUR). RPM users have the Yellowdog Updater, Modified (yum), SUSE users have zypper, and Red Hat users have Dandified yum (dnf). It goes on and on and on. It can become incredibly confusing to new users coming from Windows or macOS where there is a single, simple way to install any piece of software compatible with the operating system.
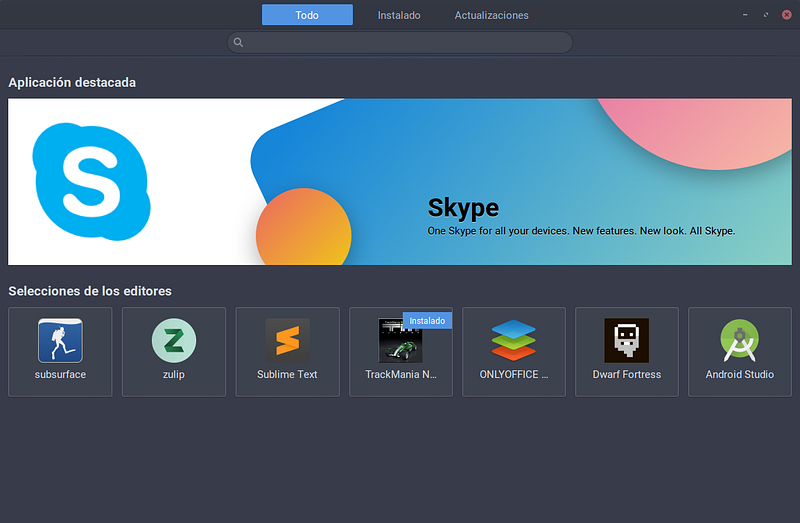
Many Linux distributions have attempted to make this easier by abstracting software installation away from the command line into GUI-centric “Software Centers”, where users can search for software and click a button to install it. However, even these have their problems because they don’t always support all of the software available with secondary package distributors like PPAs.
The solution? A universal packing system that can be installed on any Linux-based operating system and just work. However, as is customary with open source software, Linux developers have now come up with three different universal packaging solutions, each following different standards and formats.
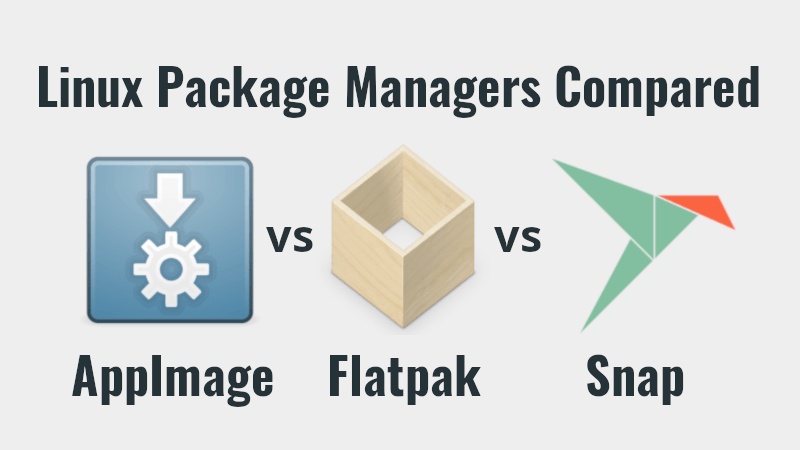
If you have been a part of the Linux community for a while, then you have probably heard an incredible amount of debate over those three universal packaging systems available today: Snaps, Flatpaks, and AppImages. Everyone has their own opinions on which are their favorites and quite a few people think they should merge efforts into a single solution, while others believe the competition between the three will breed innovation and the best will survive (which is what usually happens with open source software).
In this article, I am going to focus on just one of the three. I know that each one has its advantages and disadvantages, but some people have a hard time separating their emotions from their opinions and the debate can become heated.
Therefore, this article is not meant to be a debate on which format is better, but more of a window into snap packages, how they work, how to use them, how to create them, and why I personally like them.
The Snappy Solution

Snaps are the brainchild of the engineers at Canonical, the company behind the popular Linux distribution, Ubuntu. They were originally designed as a software distribution mechanism, called Clicks, for the Ubuntu Touch mobile operating system, but have gone on to become much more.
Though they are technically (if you factor in the start of the Snapcraft project, not Clicks) not the first universal package management system for Linux (that would be AppImage), they are highly competitive in the field and are currently being adopted by many major Linux distributions outside of Ubuntu as well as being used by major companies like Microsoft, Google, Spotify, and Mozilla to package and distribute their software on Linux. Moreover, snaps are not only targeted at the GNU/Linux operating system, but are already supported on Apple’s macOS and currently in development for Microsoft Windows.

What is a Snap Package?
You can think of a snap package like a small, isolated bundle of files that encompass the program or software you are trying to install along with all of its dependencies. From the official website:
“Snaps are containerized software packages that are simple to create and install. They auto-update and are safe to run. And because they bundle their dependencies, they work on all major Linux systems without modification.”
Obviously, there is quite a bit to break down from that. So, let’s take a closer look!
First, snaps are containerized, which means that they are installed and ran separately from the host operating system. This is ideal for security reasons because snap packages are unable to gain access to your operating system for any reason (unless specifically given the permission), which means they are “sandboxed”.
They cannot make any changes to your OS like normal Linux packages can and they run completely in isolation from the underlying system. This allows you to stay in control of your applications without having to worry about any kind of security threat being allowed into your operating system. Hence, they are considered safe to run on your machine.

Now, some software requires access to certain parts of your operating system, so Snapcraft has developed a very easy way to control which parts of your system any specific snap has access to. The vast majority of snaps are strictly forbidden from any part of your system, but some, like Zoom or Skype, require use of the camera and microphone to function properly. Furthermore, these special applications usually have to be reviewed and approved by the Security Team at Canonical before they will be accepted into the Snap Store for download.
Moreover, they auto-update on a time cycle that the user is able to modify. One of the most problematic issues regarding people and software is that they do not like to update it…like at all. Some companies like Microsoft and Google have implemented forced auto-updates to make sure that people have the latest security patches when vulnerabilities are discovered. This causes a lot of controversy within the privacy and security realm, because it also allows those companies to literally take control of your computer without your permission (even if you turn the auto-update settings off).
Even if it is the best thing for you, the user should always at least have the option to decide what they want to do with the software they’ve bought or legally acquired for free. Snaps take a different approach.
They are by default set to auto-update on a specified unit of time for users who may not be as computer savvy, however, the user has the ability to easily alter the time that updates take place, or even turn them off altogether if they prefer manual updates instead. Just don’t forget to update the software yourself! 😉
Furthermore, snaps provide an extremely easy way to rollback or revert the version of your software to a previous one. This is helpful in the rare occurrence that the newest available software that has been updated doesn’t work as well or has bugs that weren’t apparent in prior versions. This functionality ensures that you can always have a working build of your software until any issues in the new version are ironed out by simply typing in a single command and having your software reverted.
Snaps bundle their dependencies. This is very important because it can reduce quite a bit of headache in the long run. If you’ve been using Linux long enough, then you remember the days of “dependency hell”, where you would try to install a program, find out it has a dependency, search for a while and find that dependency and try to install it, only to find out that the dependency has it’s own dependency and so on and so forth.
Today, many of the advanced Linux packaging systems are smart enough to take care of the dependencies for you. However, because snaps are isolated from system resources, they would not be able to function properly without bundling dependencies with your software. The real kicker here is not for the end users, but more for developers who are packaging their software via Snapcraft.
Snapcraft is the tool that allows you to craft your snap packages. Get it, Snapcraft? Yeah, very clever ;). The tool makes it incredibly easy to bundle your software because a lot of the dependency work is actually done by it, making the developer’s job (and overall life) much easier and more manageable. Pretty awesome, huh?
In addition to all of the above, Snapcraft allows developers to build snaps that contain different versions of their software. This is extremely useful for the end user. Many times a software developer may be working on multiple projects that require different versions of software to function. Snaps provide an easy way to have multiple versions of software installed and available on your system without having to worry about the underlying details required for this practice.
Using Snapd, Installing Snaps, and Other Useful Commands
The deployment and management system for snap packages is called Snappy. Snappy is analogous to APT, RPM, or pacman in that it is the true technology behind distributing snap packages and is built up of many pieces, one of which is vitally important for installing software: snapd.
Snapd is the delivery mechanism for snap packages. If you are on a popular Linux distribution, you may very well already have snapd installed on your system and are able to download programs right now. To check, type in this command:
~$ whereis snapdIf the output from this command shows a file path location, then you are all set. If it comes back with no recognition of snapd, you must install it yourself. On Debian-based systems you can install snapd with a simple command (check the documentation for installing on other distributions):
~$ sudo apt install snapdNow that you have snapd installed, you may have to enable it on some systems. You can do this with the following command:
sudo systemctl enable --now snapd.socketSome distributions require extra steps, so make sure to consult the documentation for your flavor of Linux.
There are quite a few different things you can do with your newly installed snapd tool. I’ll list some of the most common commands that you will likely need at some point below:
# Searching for a snap package #
~$ snap find "query term(s) to search for"

# Installing a new snap package #
~$ sudo snap install <package-name>

# Removing a snap package #
~$ sudo snap remove <package-name>

# Get a small summary of a snap package #
~$ snap info <package-name>

# Get a list of all snaps installed on your machine #
~$ snap list

# Update all snap packages on your system #
~$ sudo snap refresh

# Update a single snap package #
~$ sudo snap refresh <package-name>

# Roll back to the previous version of a snap package #
~$ sudo snap revert <package-name>

# Enabling and disabling snap packages #
~$ sudo snap enable <package-name>
~$ sudo snap disable <package-name>
There are quite a few more commands and options to be provided. To find a listing of these, check out the manual pages here.
Obviously, the engineering team behind snaps have made it extraordinarily easy to manage all of your snap packages from inside the terminal itself. However, it gets better.
Installing snaps can easily be done via the command line, but for those who are newer to Linux or just prefer GUIs, there are two additional options. First, there is a desktop client for the Snap Store that can be installed on your machine using the following command:
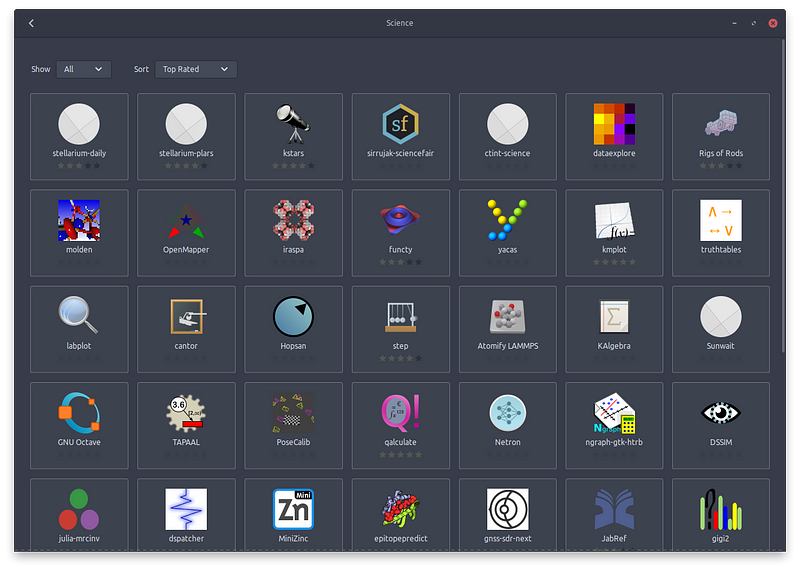
~$ sudo snap install snap-storeThe interface to the Snap Store will appear very familiar if you’re at all used to using the GNOME Software Center. You can search for packages to install by name (or a query if you don’t have the name) as well as filter to certain software categories based on what you are looking for. There is also the ability to see which snaps you have installed on your system and easily remove them with the click of a button if desired.
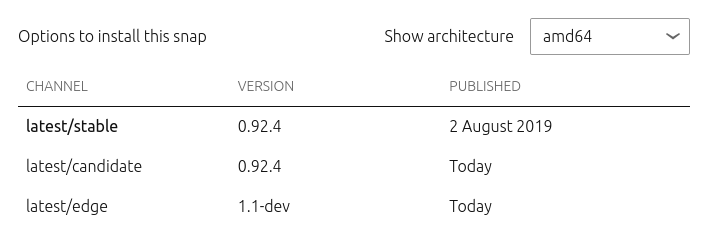
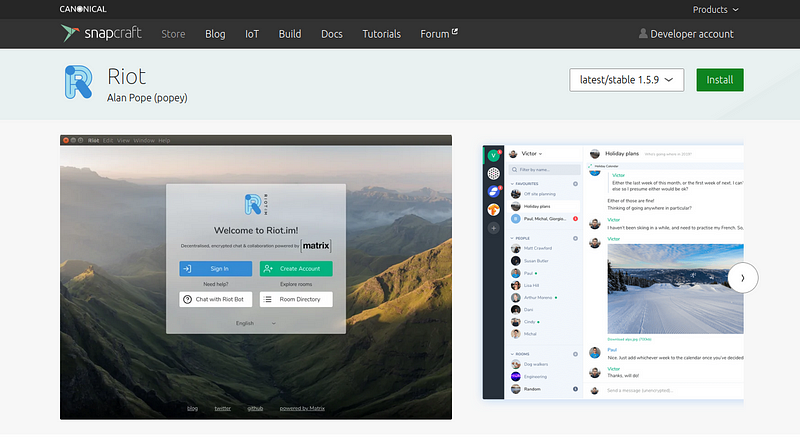
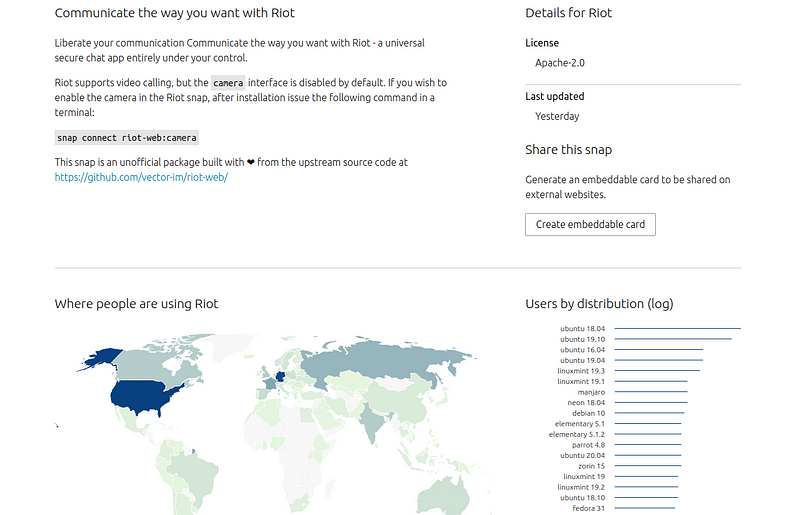
In addition to the desktop client, you can also use the official website at snapcraft.io/store. This gives a very nice web interface where you can search for snaps. When you find one you want to install, you can browse its dedicated webpage with a ton of very useful information including easily configuring which version of the snap you want to install, the author, a detailed summary, screenshots of the application, the licensing, the last time the snap was updated, as well as a cool map showing the broad locations that users who have downloaded the snap are from and what distributions they used to download.
As you can see, Canonical has taken great measures to ensure that searching for, installing, and managing snap packages is as easy and intuitive as possible for all different kinds of users. Also, because these applications are sandboxed from your system, you will not have to worry about them doing any damage to your operating system or underlying hardware. Now, that’s what I call a great bonus!
Creating Your Own Snaps
One of the huge advantages of using snaps to distribute your software is that they are extremely easy, fast, and relatively straightforward to create and publish to the Snap Store. In all honesty, this entire process can be done (on a relatively simple piece of software) in under an hour with no prior knowledge and just the official documentation to guide you. That’s an insane save on time compared to what it would take to package it as a DEB, RPM, or really any traditional packaging format.
To begin creating your own snap packages, you will need to install a couple of tools, which conveniently are packaged as snaps themselves in the Snap Store. The two tools you need are Snapcraft, the actual building mechanism, and multipass, which is a tool to manage the Virtual Machines (VMs) that allow for building snap packages.
NOTE: These two tools are what are known as “classic” snaps. That means that they will be provided access to certain parts of your system that they need to function properly. If you type in the commands below without the “- -classic” argument, you will get an error message such as this:
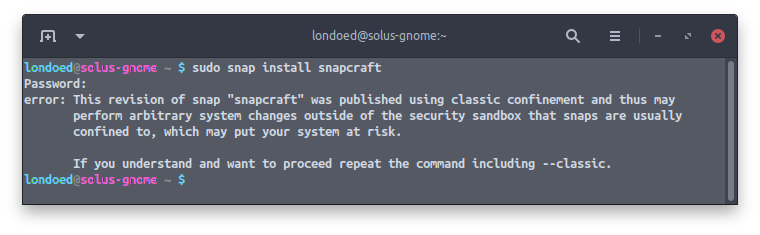
To install these tools on your system, you must have snapd installed and enabled and then run the following commands:
# Install the Snapcraft tool #
~$ sudo snap install snapcraft --classic

# Install the multipass tool #
~$ sudo snap install multipass --classic
Once these tools are installed, you are ready to begin creating your own snap package! To begin the process, make sure that you are in a directory that will be used for snap development, and then use the following command to initialize your snap:
~/path/to/directory$ snapcraft initThis command will create the most important document to building and editing your snap: a simple YAML file. Here is an example of the initial snapcraft.yaml file for a project:

As you can see, the information prior to the grade definition is pretty standard stuff that can be filled out in a matter of minutes. Now, there are a few things you need to consider when building your snap package:
Where is the source of your software coming from?
Snaps are extremely flexible and can ingest software from many different sources including online git repositories (like GitHub or GitLab) or even binary builds of the software itself. Some of the tools needed in the VM will differ depending on what source you are using.
What programming languages and tools is your software built with?
Again, this is an important piece of information as the VM will need to install compilers, interpreters, or other software building tools to allow it to create your snap package. This is done using what are known as plugins in your snapcraft.yaml file.
The currently supported programming languages available to build snaps include C, C++, Go, Java, JavaScript, Python, Ruby, Crystal, .NET, and Rust.

In addition, the build tools currently available include autotools, cmake, make, meson, qmake, scons, and waf.
The platforms available include the Linux kernel and the Robot Operating System (ROS).
Additional tools include dump (simply dumps the contents from a specified source), nil (for parts with no source to import), and plainbox-provider (for parts containing a Plainbox test collection: provider).
Does your software need access to system resources to properly function?
The vast majority of snap packages use what is known as “strict” confinement. This is the most restrictive level for snaps that only allow minimal access to the system that is always considered safe.
However, if your application requires access to parts of your system (like the camera for video recording or chat), there is another confinement level that supports this called “classic”. However, this level does not provide access to all of your system resources like traditional packaging systems, but only those that are absolutely necessary for your software to function properly.
Snapcraft uses functionality known as interfaces to allow your software to access specific parts of the host system. These include special privileges like network access, desktop access, camera usage, sound, or even thermal information access.
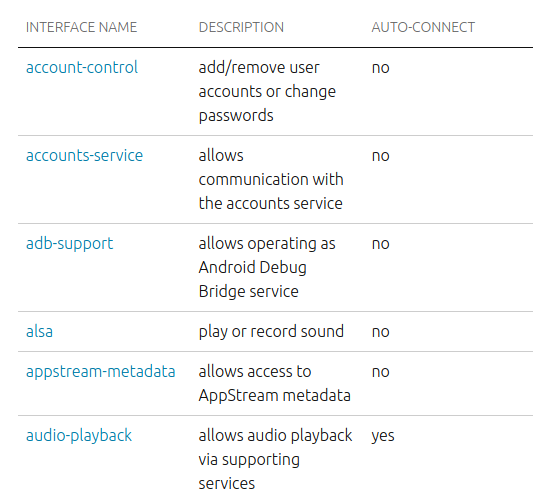
There are a plethora of supported interfaces for Snapcraft. Figuring out the correct interfaces needed for your software is likely the most time consuming part of building a snap package, however, there is great documentation detailing the different interfaces available and exactly what they provide.
Moreover, there is a lively support forum that will allow you to get feedback directly from Canonical’s security team and other more experienced Snapcraft users.
Keep in mind that if you submit a classic confined snap package to be published in the Snap Store, the Canonical security team will thoroughly audit it in order to establish that the interface(s) you have are appropriate and absolutely necessary for your software to function. They may deny your package and give you suggestions on how to fix your interfaces for the best security practices possible.
Once you have figured out these main obstacles and updated your snapcraft.yaml file with the appropriate information, building your snap is as easy as:
~/path/to/directory$ snapcraftIf everything goes well, you will receive a success message that your snap has been built. Now, you can test the snap package out to make sure that it is functioning correctly by installing the package as you would normally install any other snap package, but in developer mode (devmode). This can be a very iterative process and take some time to fine-tune your snap package.
If you would like an in-depth video tutorial on building snaps orchestrated by Canonical’s own Developer Advocate for Snapcraft, Alan Pope, check out the link below:
Finally, to publish your finished application to the Snap Store, there is a three-step process:
- Create your developer account
- Register your application’s name
- Release your application
For more detailed information on each of these steps, please consult the official documentation regarding publishing snaps, which can be found here.
Congratulations, now your software is ready to be downloaded universally by any Linux (or macOS) user with snaps enabled.
Why I Personally Like the Snapcraft Project
What some people may consider a downside of the project, I consider a major win. The fact that Canonical is behind the engineering of Snapcraft makes me feel confident that it will only grow and improve as they have an incredible and proven engineering team (and software portfolio) and have shown a ton of dedication to this particular project.
Though some may critique the project because it has a proprietary backend, I find that absolutely silly. In fact, I feel more comfortable using snaps due to the fact that there is a centralized repository that is constantly being monitored and improved by Canonical’s security engineers, especially for extremely popular software applications. It makes the project feel more professional in the long run and, quite honestly, having a solid backing is fundamental in my opinion for a project as important as universal packaging.
For instance, the popular messaging applications, Discord and Telegram, also have proprietary backends, however, many Linux users still employ them in their day to day use with no problem. The same can be said for GitHub. I see a ton of open source and Linux-related software still being hosted there, even with GitLab as an alternative. In fact, this should cause more concern for the Linux community as now GitHub has been acquired by everyone’s favorite company to hate: Microsoft.
The main reason why I like the Snapcraft project, however, is not due to any of the petty political or philosophical debates surrounding it, but more so the fact that it is by far the easiest to use, manage, and contribute to in my opinion. And that means a whole lot more to me than the open source versus proprietary software debate. I’m a pragmatist and I believe that you should use the best tool for the job and, in my honest opinion, Snapcraft has so far been the best tool for universal packaging. I have nothing against Flatpak or AppImage (I do use them for certain software as well), they are both compelling and absolutely incredible projects in their own right, but I have my preferences and I’m sticking to them unless something drastically changes.
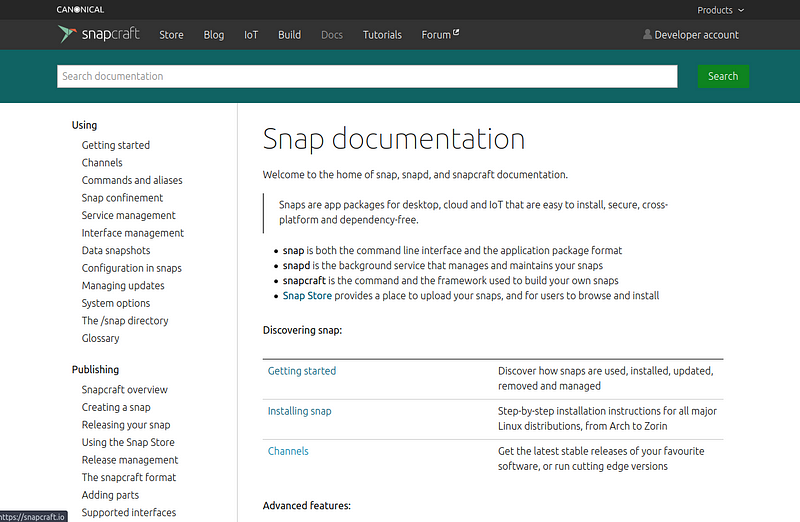
If you would like to learn more regarding any aspect of the Snapcraft project, I encourage you to check out their very detailed and intuitive website here. Happy package managing!
Thanks for reading and I hope you have an incredible rest of your day! 🙂
