One of the areas of the Linux Desktop that has left me with just a bit of disappointment is the available application options for the web camera. Sure, there are some decent options out there but my issue is that, there hasn’t been anything as intuitive as what one would experience on the mobile platforms. Some of those decent applications, Kamoso and Cheese, work well enough but I have had some crashing issues with Cheese and Kamoso lacked some of those features the kids rave about on their phones and tablets.
On one of those days of aimlessness, where I am staring at my computer as I obviously had real things I need to do, I stumbled upon this application, Webcamoid. I poked around a bit, became familiar with its fantastic features and I am now convinced it is the best web camera application, not only on Desktop Linux but on any device I have ever seen or used.
Installation
It goes without saying, installation is generally a good place to start when trying an application. Since openSUSE is my primary distribution of choice, the process for installation is as simple as using the direct installation method.
If you prefer the action-packed, fun of the terminal:
sudo zypper install webcamoidIf software centers are more your thing, Discover gives you another easy way to get the application installed on either Leap or Tumbleweed. Results for other distributions may vary but a quick search for “webcamoid” should provide a button to install the application.
If you are running something else, I guess you are going to have to search for it and a good place to start is the project GitHub site.
Features
Webcamoid is not light on features. What makes it great is it has more features than what is practical so it leaves you with hours of entertainment. This has the potential to be more than just a web camera tool for taking selfies, pictures or video. It can also be used to record your desktop. I will illustrate a few of the features here.
The Interface
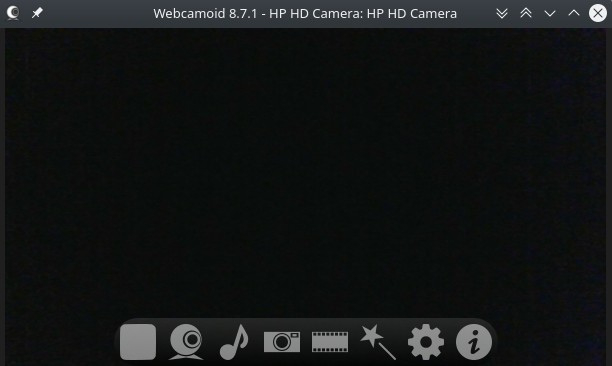
Pictured here is the interface of Webcamoid. Though, here, I flipped the little door over the eye of the camera so it is blank. If you notice, along the bottom, there are several buttons that are begging to be clicked upon. From left to right: Stop/Play, Configure sources, Configure audio, Take a photo, Record video, Configure Effects, Preferences, About.
Stop/Play
A Quick Webcam Picture
The first button, when it is the square, is the Stop button. Selecting this will turn off your camera and the square will be replaced with a triangle. You will also notice that the take photo and record video options are ghosted out as well. To start the camera back up, just press play!

Configure Sources
Once you are through with the excitement of turning on and off your webcam, you can continue your journey and move to the second icon on the toolbar. This is the Configure sources button.
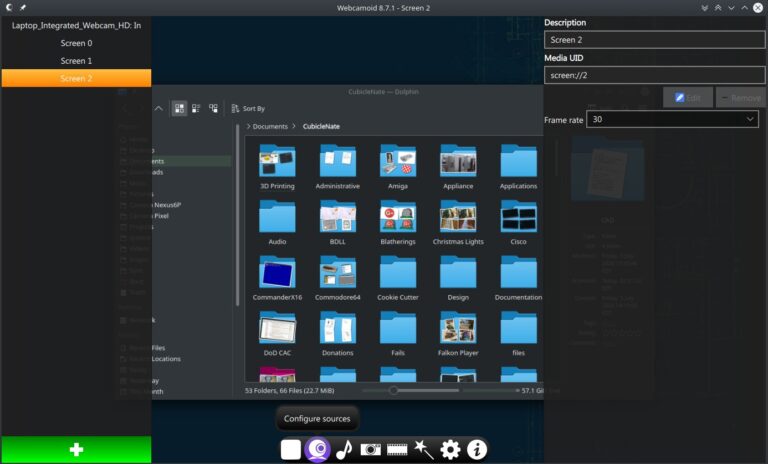
Here is where you can choose your input sources for the application. If you have multiple web cams, you can choose between your video sources but also, alternatively, you can select one of your displays as an input. Since I have three displays on this particular computer, I can select screen 0 through 2.
Configure audio
Moving adjacent to the right, you will find the Configure audio button.
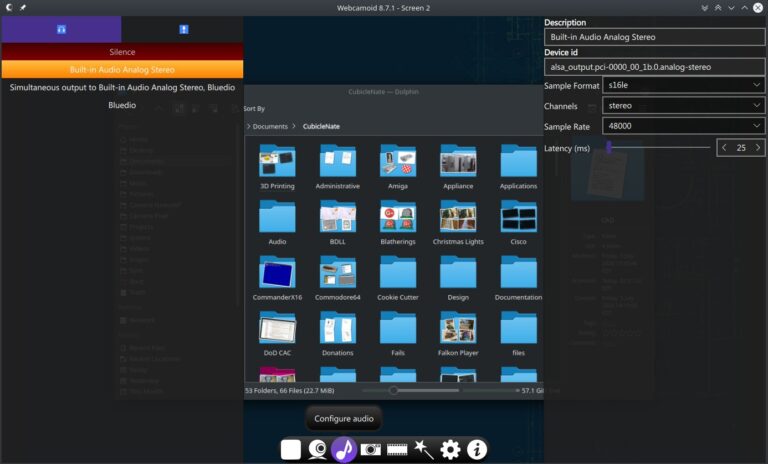
You can have it record from an output or input source. From the list above, selecting Bluedio, the application would record whatever audio is streaming to the that device. You could use this if you wanted to record yourself doing a tutorial, playing a game or even, perhaps, record a video of you talking into the webcam with your microphone as your audio source.
Take a Photo
Like any good webcam application, you can just take a regular photo with a click of a button. The stand out feature here is the “flash” option. The application accomplishes this by turning your screen white as it captures the image.

Why would you want to do this? If you are like me and leave your phone in another room and you need to take a quick picture of yourself or some object, it is right here at your fingertips. It is very quick and easy to capture that image and send it out with whatever communication platform you see fit. After the picture is taken you are presented a dialog box to save the file to the location of your choice. I will say, what would be handy here is if it just dumped the image into your clipboard and paste it wherever but I will take the file.
Record Video
Much like the previous feature, this one does similar except captures video, as the heading would suggest.
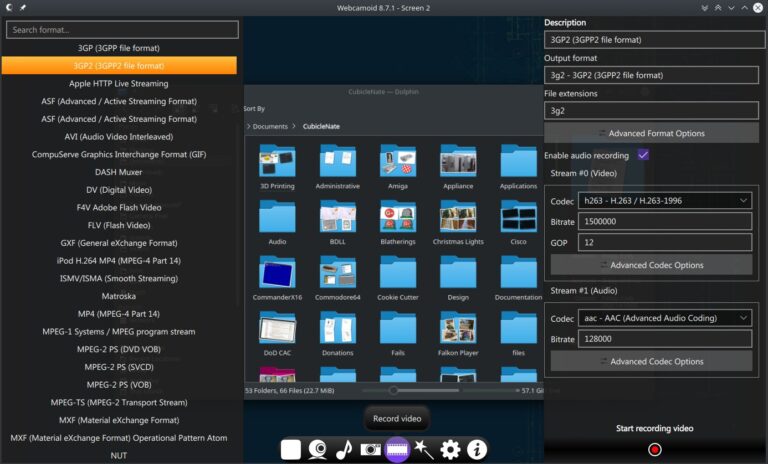
When you are ready to record your desktop or webcam, you are presented a whole host of options. Here you can select the video format of your choice, your bitrate and tweak anything else that my interest you. In my case, I have left the defaults as they were and was happy with the results. Don’t be intimidated by the options. When in doubt, leave them alone.
Effects
Here is where things get fun and a bit ridiculous. Maybe ridiculously fun? What makes this webcam application neat is not the video or picture taking function, you can get that elsewhere, although maybe not packaged with as much polish. The effects, are perhaps not incredibly useful, but they are fun. I am not going to cover every effect as that would take some of the fun away from you
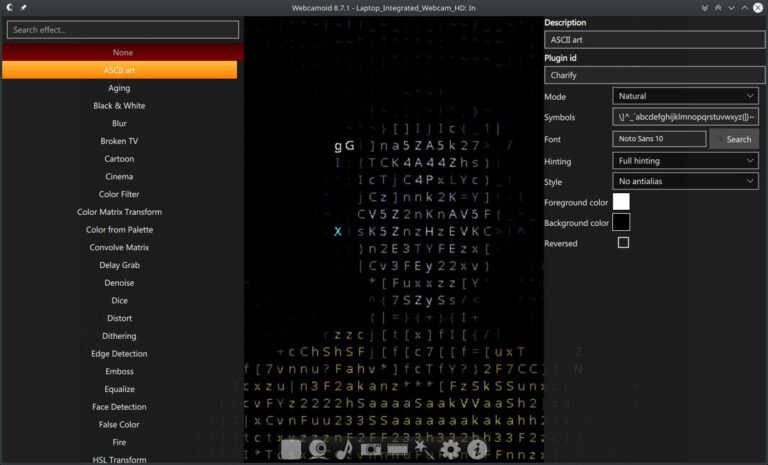
[ ]Instead of sending a Normal picture of yourself, you just might want to send a clever photo of yourself in full ASCII goodness. Maybe you want to see how you would look the terminal. You can, of course, change some of the aspects of it to fit your aesthetic desires.
Pixelate
This is possibly one of the more fun effects. It can be fun just to look at for the novelty factor or you can pretend like your identity is being hidden for some reason. I suppose if you wanted, you could also distort your voice to take this one step further.
It is fairly obvious why they call this effect what they do. The feature of note here is that you can change the size of the pixels in both the X and Y direction, as demonstrated in the video above.
Matrix
It may also be fun to turn this on when no on else is around to become a disturbance in the Matrix and relive the 1999 classic and reenact one of your favorite scenes in the comfort of your own home.
I am not admitting I have done that or anything…
Broken TV
I am not sure why you would want this effect but I did find it fun until it gave me a bit of a headache.
I must admit there was a temptation to slap the side of the screen when watching it as that is what I did after searching for and adjusting that knob in the back of that old 13″ black and white Zenith I once had.
Fire
I couldn’t help but think of that superhero Firestorm from the “Flash” series on the CW when I used this. Thankfully, using this effect didn’t require me to combine with anyone.
There are many more effects but to show them all would just make for an irritatingly long article so I picked out four that brought me the biggest smile. If nothing else, I do recommend you check out the effect called, Quark. After seeing these others, that is worth checking out for a cheap smile as you do some more super hero play in the office or home office.
Settings
There is a lot going on under the settings. There isn’t anything you must do here, but you are given the option of adding a virtual input, add plugins or even disable them. In my estimation, that makes this a very robust application. It would be nice if there were options to change the UI accent color and an option to have a default folder to dump the photos into.
About
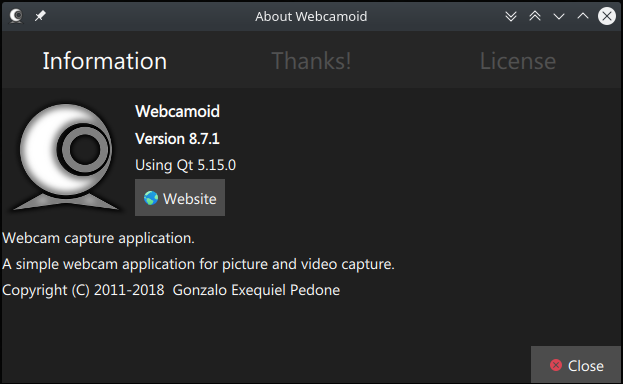
Like every good application, you get information about the project itself. Here we can see the version number, a brief explanation and the developer, I am assuming, along a copyright that looks as though it hasn’t been updated in a bit.
What I Like
This is packed with more features than I will likely use. Many of the effects are quite novel and fun to play around with. I am not sure exactly how practical they are unless you use the filters to soften the image for you “Glamor Shots” or you just want to present yourself in ASCII art to confuse someone.
It is great for doing a quick video of you or the desktop adequate flexibility on your audio source to accompany it. This could fill that role for demonstrating some desktop feature and sharing it.
When coupled with OBS and the virtual webcam, this could be a lot of fun for remote meetings. I do think this would be good for the next nerdy Linux live stream in which I take part.
What I Don’t Like
The major irritation of this application is the inability to select a default location. Every time you take a picture or video, you are presented a dialog box. Maybe this is a good but I would prefer to have the option of a default location.
The accent color does not match my desktop. Purple is fine but I would at least prefer some easily presented option to change that color. This is not a deal breaker, I just happen to like that openSUSE green and would like to change it as such.
Every once in a while I have to restart the program due to a rather lengthy lag between the time of action and display. No idea what causes that but it does happen from time-to-time and not easily reproduced. Should it happen again, I will try to take note of what could cause it and file a bug report.
Final Thoughts
I am so happy with Webcamoid, I have pinned it to my task bar on my Plasma Desktop. This application, with the level of control over the camera itself, the range of options and the bundled bits of fun has made this an excellent go-to for simple video capture.
I do hope that this application continues to received features and improvements as it is already the best I have experienced. On second thought, maybe I want the other applications to up their game and continue to push this project. Rising tides, raise all ships, as it were. Webcamoid has upped the game on webcam fun and I thank them very much for the tool.






I use Droidcam. The Android app isn’t open source as far as I know but the desktop client is.
I would love to explore that. Thank you for sharing! I have heard of people using it and now that interests me. Thank you!
I’m not exactly sure of your desired result of the webcam. If you are not looking for real-time streaming, perhaps the one to try is Haven. Haven can be setup to trigger on light changes, motion, sound, vibration (accelerometer) – even power changes – and records data, sound and video to the local device. It can then be setup to send alerts through Signal. Plus, it can be setup on old or throwaway phones.
https://guardianproject.github.io/haven/
Join the discussion at forum.tuxdigital.com