Computer cases are, for some, an expression of ones own personality. A typical black, grey or beige box communicates a more spartan, utility view of a computer. It is just there to do a job. For those that like to have transparent sides with RGB lighting, RGB fans, rainbow vomit on their memory and keyboards, this is probably not anywhere in your wheelhouse. Those that want to build a computer in a case that looks like it is from multiple decades ago. You just might be the customer that MyRetroComputer wants to click on their site and have a gander.
This is a review on the case design, structure and practicality of building your computer in a Commodore 64, Breadbin style case. I will evaluate the Design of the case, the keyboard and included bits for the practicality of building this into a retro-modern computer.
Case Design
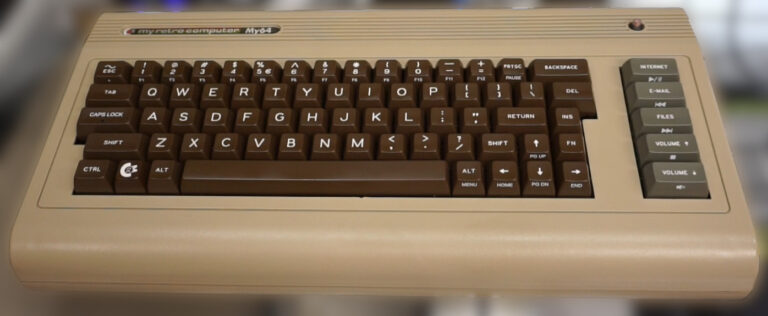
Visually, this case looks a lot like the Commodore 64 from the early 1980s. In fact, if you weren’t looking too closely, you might think it was that very thing. With closer observation, you will see the differences. The color and shape of this case is right but that is where it ends.
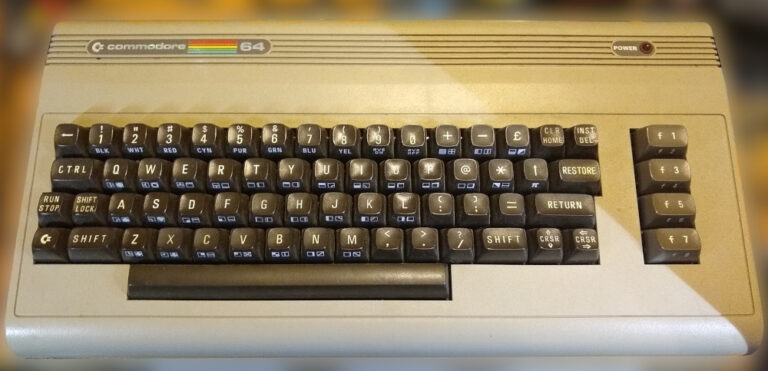
The original Commodore 64 case was of a fairly sturdy design but the more you worked with it, the more you saw the cost cutting measures that Commodore made. Things like, using plastic clips to reduce the case screw count to three. The case, in contrast, is held together by six screws, not too dissimilar to the Commodore 64 case but displaces three clips for three screws which is a welcome decision as those clips just didn’t hold up.
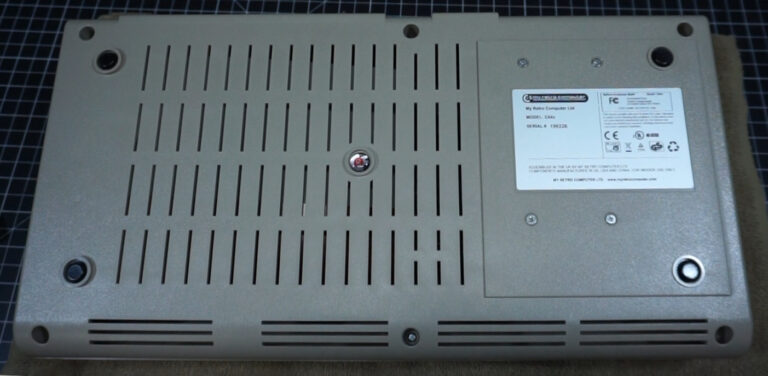
In examining the thickness of material, the case doesn’t skimp out or have any thin areas that are of concern. The nominal thickness of the case walls is 3.3 mm which is really pretty substantial. The diameter of the screw bosses at the base is 12 mm as they intersect with the case walls is substantial enough to hold up for many years without snapping off. The screw boss that intersects with the top of the case is 8 mm in diameter and intersects on a curved surface effectively increasing the cross sectional area which should be of more than adequate strength.
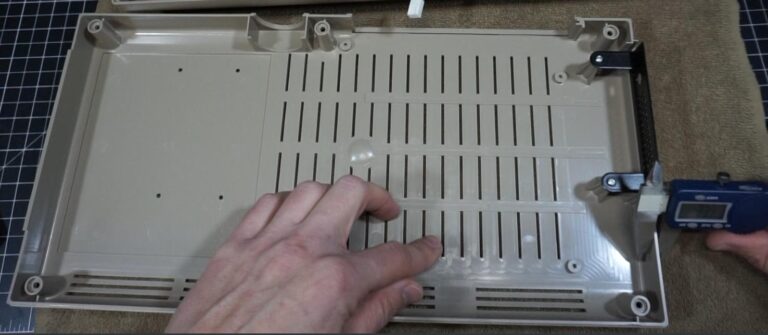
One concern of the screw bosses themselves, those that hold the case together as well as those that retain the motherboard is the lack of brass inserts. The issue here is going to be the number of times you can reassemble the system without stripping the thread locations. Although precautions can be taken to reduce the wear on the plastic bosses. I don’t really view this as a major issue as I don’t see me swapping motherboards and components out of this machine often. Consider this what you will for your view of it.
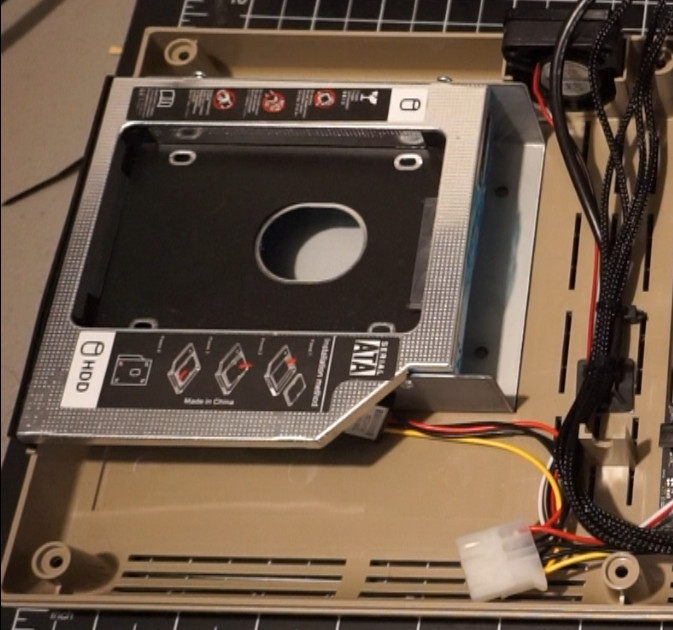
Since modern motherboards tend to have NVME slots, the two drive bays internal this case can set you up as such that you can house a lot of internal storage. The limiting factor with this system is likely to be power delivery to the machine more than internal space for drives.
Keyboard
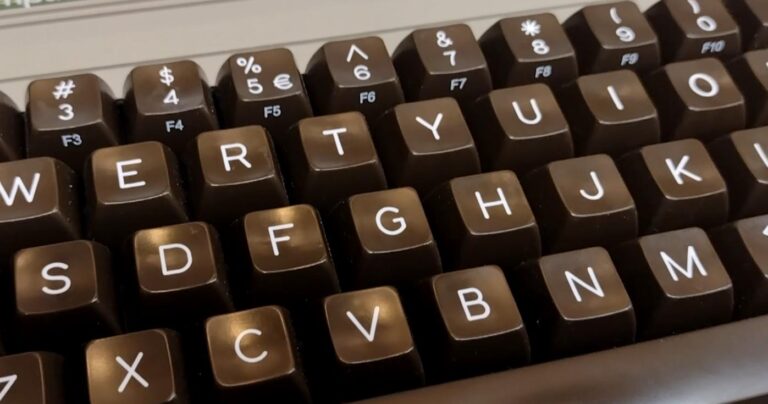
The keyboard layout is great, considering the space available and keeping within the general look of the Commodore 64 for which it is modeled. Instead of having the function keys to the right side of the keyboard, they are along the top row and invoked using the Fn key on the keyboard. It can be cumbersome to use the function keys, especially if you are a heavy Function key user.
The feel of the keys themselves are quite nice. The Blue Cherry Switch keyboard has the perfect resistance and makes a very pleasant audible click, unless you are in some sort of online conference call. One small issue with the keyboard is the lack of nubs or indicators on the F and J keys so if you aren’t paying attention you might start typing gibberish.
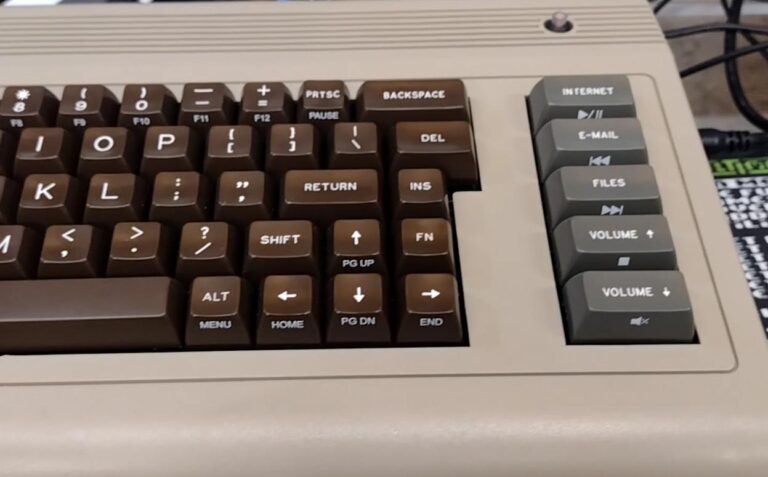
The media keys are great and conveniently located to the right of the keyboard with the secondary functions of each key used by pressing the Fn key. Having an Internet, E-Mail and Files specific keys does feel a bit 1997 but I do appreciate their existence on the keyboard as those functions can be easily reassigned to more useful tasks.
The best part about this keyboard layout is the fact it has the proper inverted “T” cursor keys. The biggest issue I had with the Commodore 64 was the awkward inclusion of the shift key to move up and left so having this more customary layout makes this the better breadbin case.
Overall impression
The space inside the case is substantial enough to accommodate a mini-ITX motherboard and function quite nicely, so long as there is some sort of integrated GPU with the system. Something like the AMD Ryzen with the Vega graphics or Intel with their integrated graphics. Whatever you put inside of this case, thermal dissipation may be an issue if you prolong stress it. More casual use may not be an issue at all.
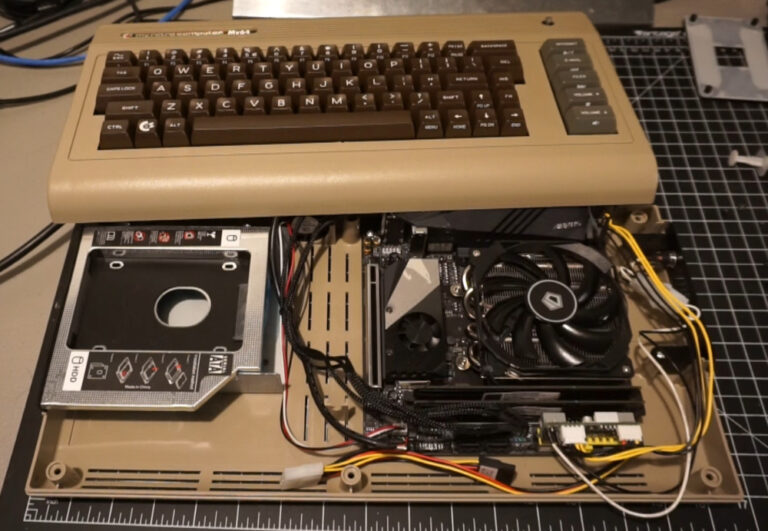
The Commodore 64 styled case has some thickness to it. This means, you are not going to be resting your wrists on the computer easily. This is not, by any means, an ergonomic keyboard layout. If ergonomics is an issue, this may not serve you well at all. If you are one that doesn’t rest your wrists on the keyboard, you may find this easy to use.
The case itself is sturdy and typing on it is quite enjoyable. There is not the slightest bit of buckling when typing on it and the key travel is absolutely perfect. Though some of the key placement may be a bit more unusual, such as function keys, Home, End, Pg Up, and Pg Dn requiring the pressing of Fn, the convenience of the right-hand side media keys do make up for it.
What I Like
The overall look of this computer invokes oodles of happiness. It provides that 1980s charm with the convenience of a more functional layout, specifically the inverted “T” shaped arrow key arrangement. The keyboard itself feels great and gives fantastic tactile response to the fingers as they dance away across the keys. I would be pretty confident that the keyboard will last for many, many years.
There is something quite convenient about having your whole computer, keyboard and all, in one convenient case. This would be a perfect LAN party setup… so long as you aren’t playing anything too taxing.
What I Don’t Like
Unfortunately, there are no nubs on the F and J keys so if you lift your hands away, you will have to make an effort to locate the proper positioning for the home row. I have, on more than once occasion had my hands positioned incorrectly and typed a bunch of gibberish.
Final Thoughts
This computer case is squarely directed towards the vintage tech enthusiast. The practicality of this case is is a mixed bag. Though you can have a single unit as the computer with relatively inexpensive components, you will have to be very selective on the components. The CPU fan and memory will have to be under that ~30 mm height limit.
The case itself is well built but the lack of brass inserts in the screw bosses will limit the number of times you can effectively open and service this case. The thread forming screws, if you are not careful to reuse the thread paths each time, will eventually fatigue and strip out the material.
Regardless of the shortcomings, this case is close to perfect, especially when paired with openSUSE Tumbleweed. For the complete build process I used with this case, see the linked video.
References
https://myretrocomputer.com
https://opensuse.org
https://CubicleNate.com

